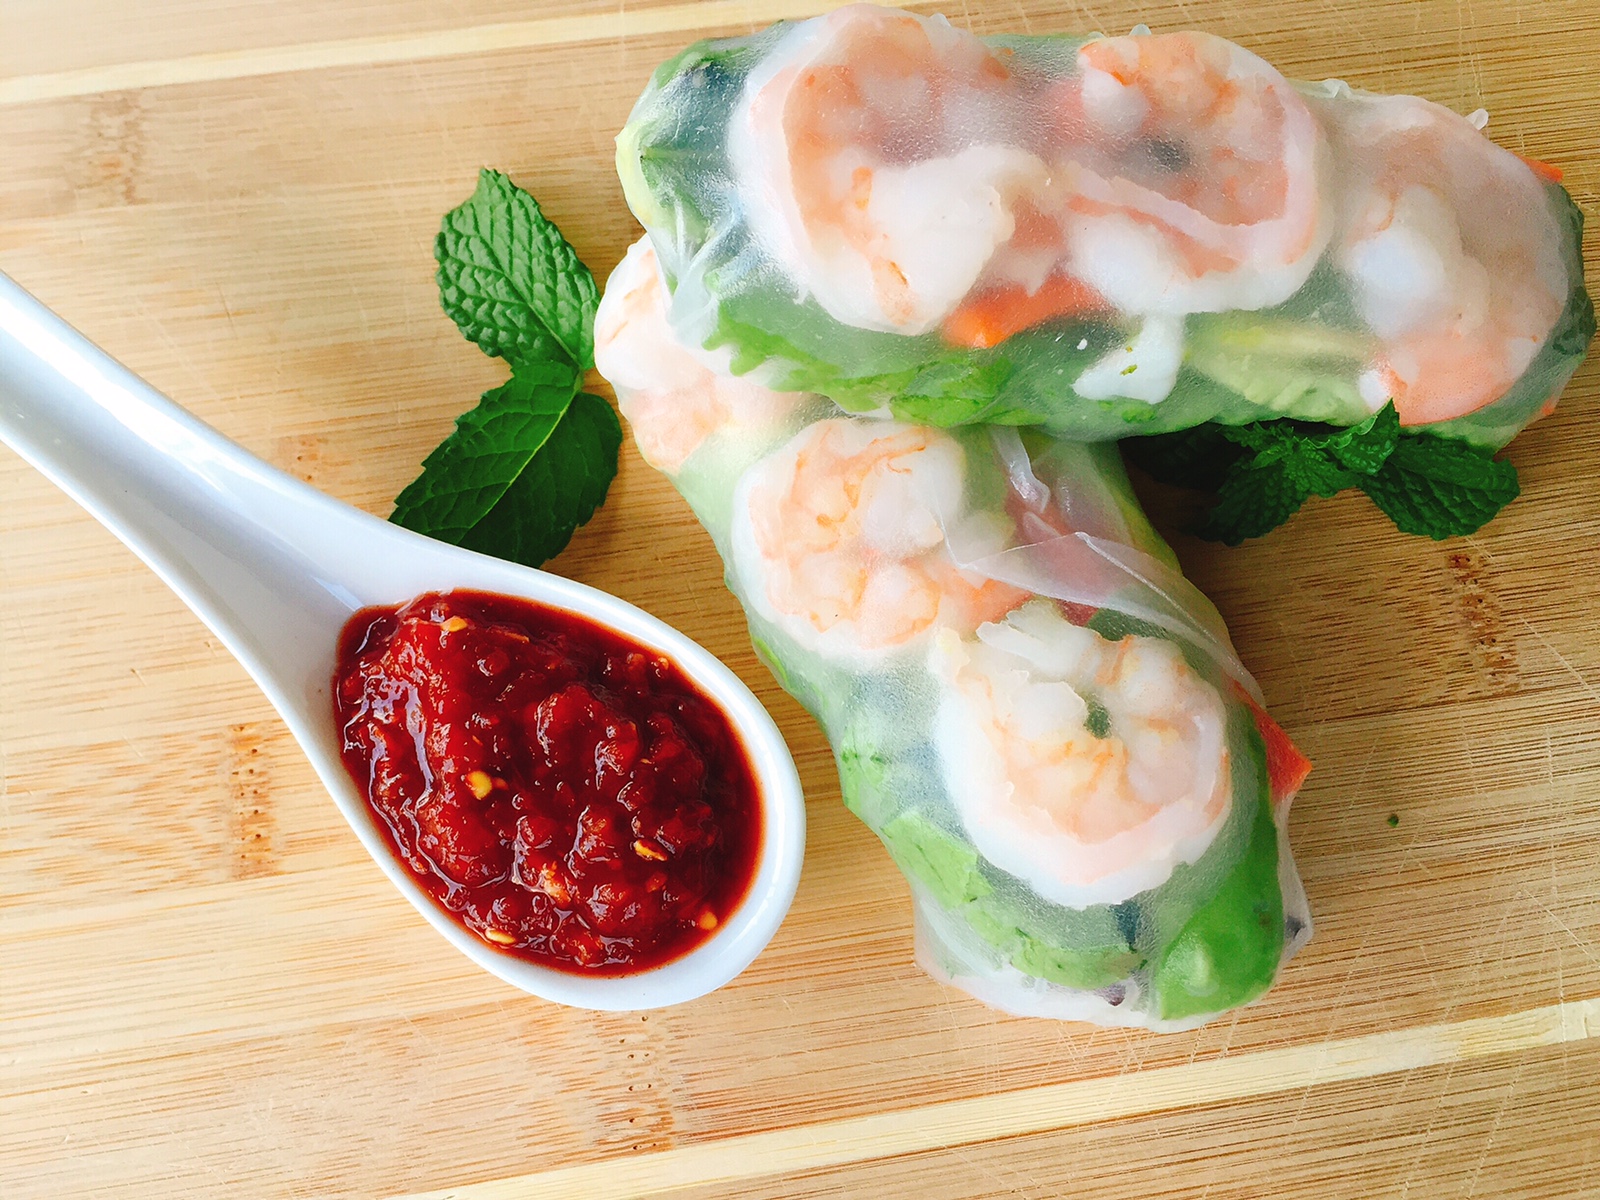
Summer Shrimp Rolls

Chrissy Teigen you genius. If you haven't heard of her recent cookbook, Cravings, then you may be living under a rock. Chrissy is wife to John Legend, momma to Luna, hot model and now, a New York Times Best Selling cookbook author. 

Cravings came out last Spring. The book's tagline is "recipes for all the food you want to it." It's just that. Page after page of recipes your everyday person actually wants to eat and make. When I received my copy, I did as I usually do with a new cookbook. I sat down with a stack of stickies going through marking each recipe I wanted to make. I read the book cover to cover. Like actually read all the little blurbs and antecdotes that no one usually reads. Chrissy writes the book like she is talking to her best friend, texting her husband or ranting on Twitter.  She also has insane pictures of her in hot pink ballgowns, sitting on John's lap shoving hot dogs in his mouth as well as modeling bathing suits by the pool chowing down on chicken wings. She pulls it off, it's too good.  

After reading through the book I found myself with practically every page marked with a sticky. Yellow Cake Baked Oatmeal, Caprese Salad with Crispy Proscuitto, Mac and Cheese, Baked Pasta with Mozzarella Bombs, Steak Bites with Melty Blue Cheese Butter, Artichoke, Spinach and Buffalo Chicken Dip, Cheesy Guacamole, Chorizo Queso, Sh*t on Toast, and BTI (better than Ina's) Roast Chicken and Vegetables. SO much goodness in this book. 

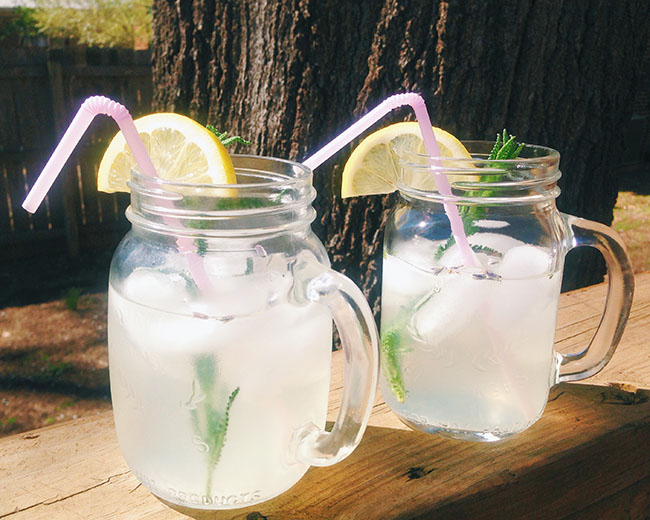
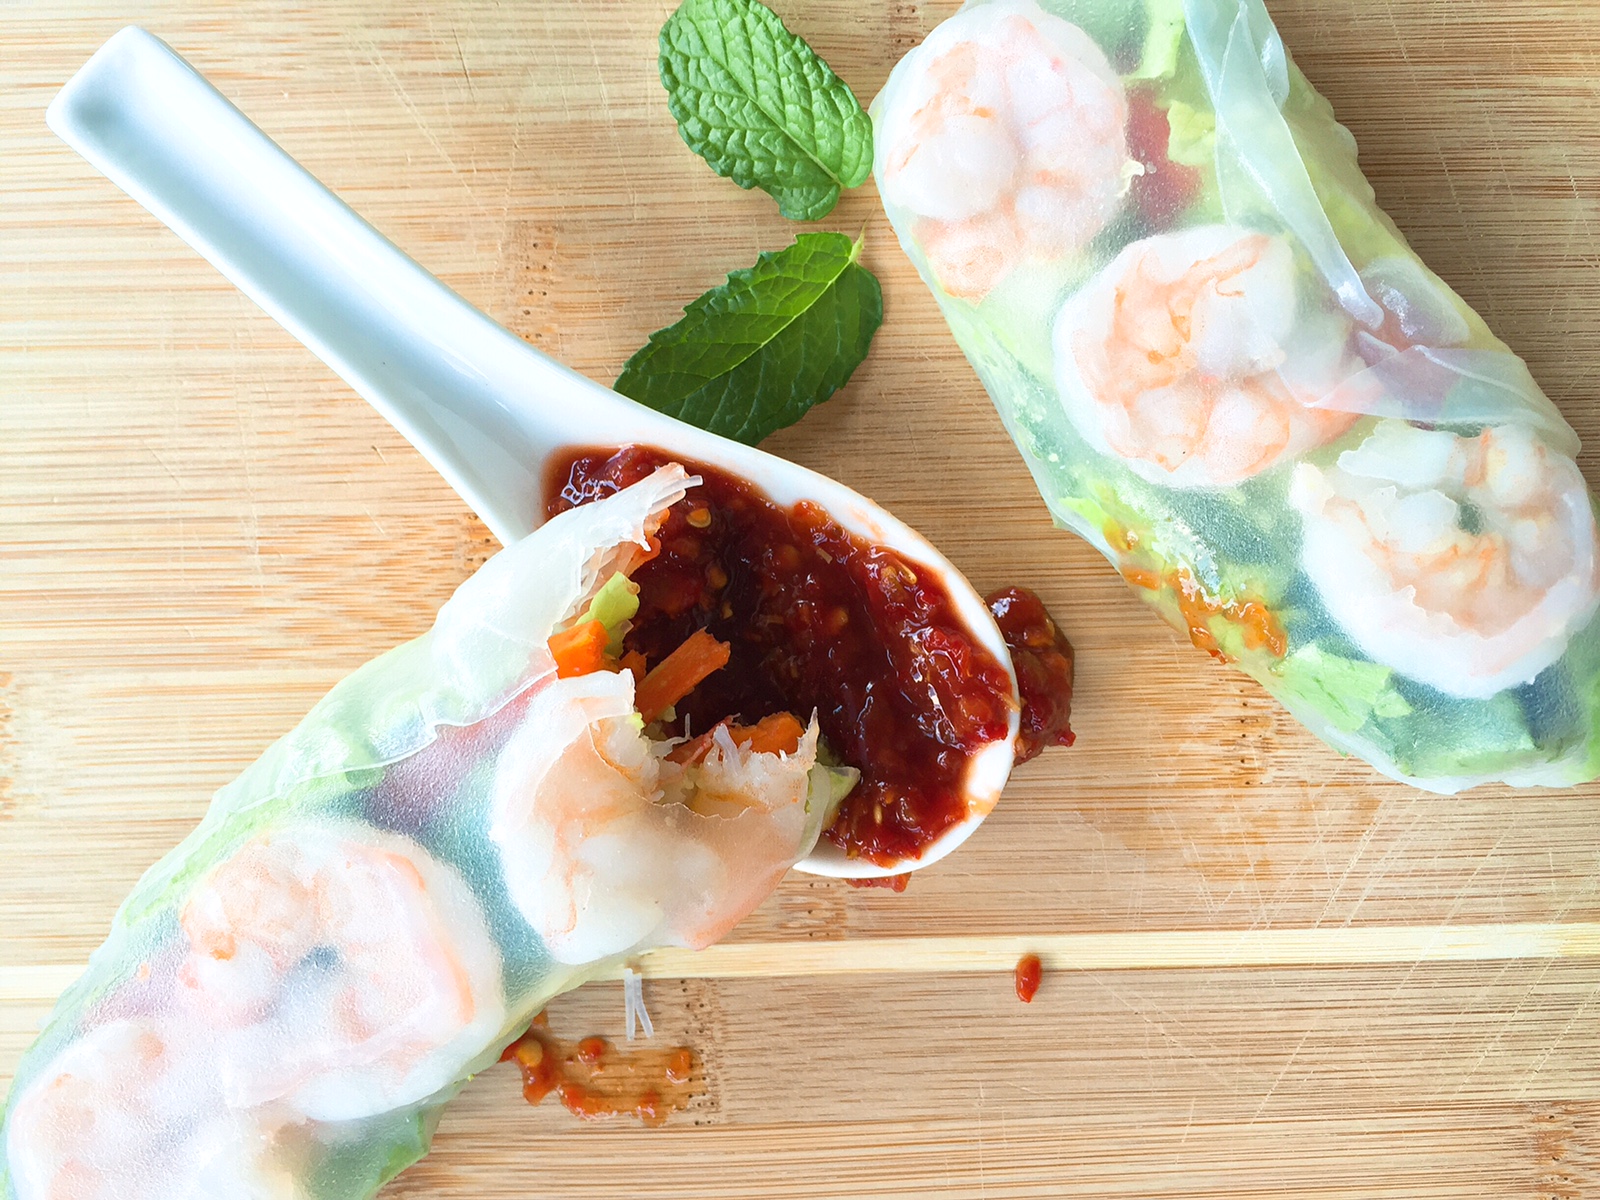
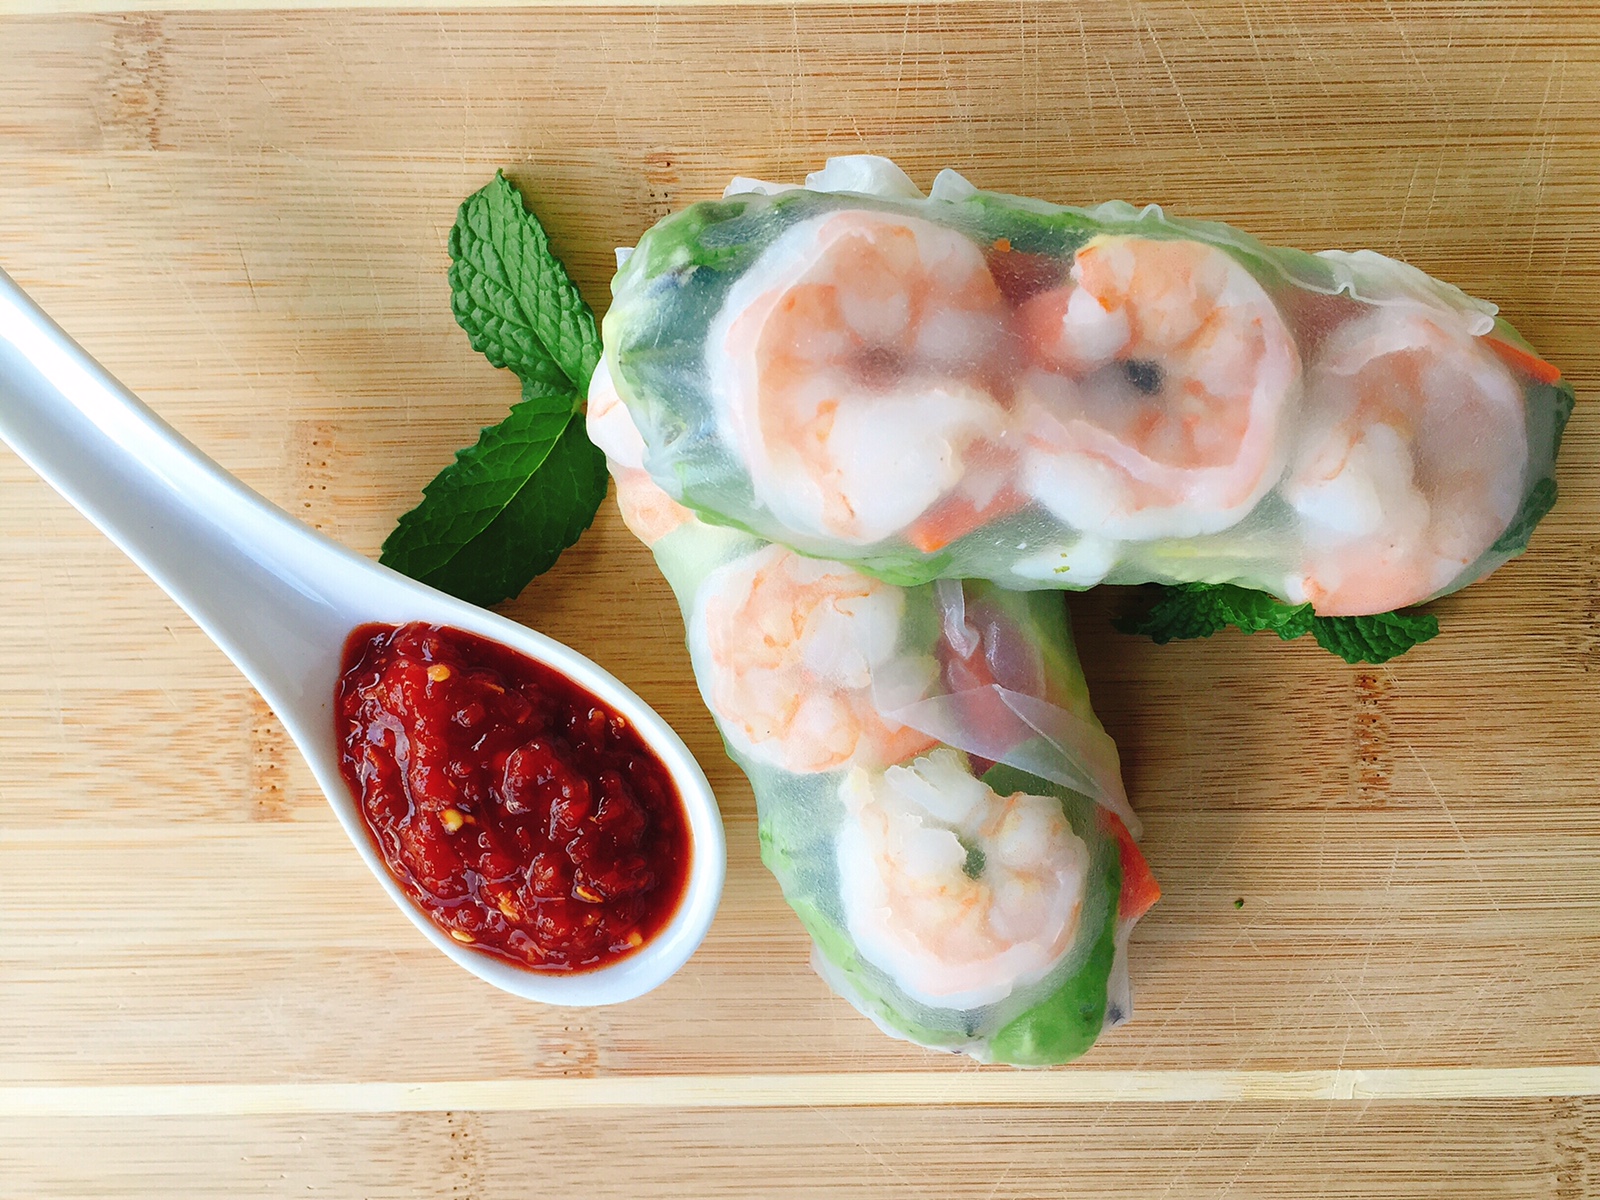
The thing I couldn't wait to make though were these Summer Shrimp rolls. Those sticky rice paper fresh rolls you get before your meal at Thai places can now be made at home. I made these for dinner almost every night for dinner last week. They are so satisfy and perfect for a summer dinner. Kudos to you Chrissy for bringing the fire to the world of cookbooks. 

Summer Shrimp Rolls from Cravings
yields 8 rolls*

Ingredients:
4 to 6 red leaf lettuce leaves
8 medium shrimp, peeled (fresh or frozen (thawed))
salt
1 ounce Asian vermicelli or rice noodles
8 large or 16 small basil leaves
8 large or 16 small mint leaves
1 medium carrot, cut into 3-inch long julienne strips
1 avocado thinly sliced
8 (8-inch) round rice paper wrappers (you can find in most supermarkets with the Asian food)
Thai sweet chili sauce, for serving*

Directions:
Rinse the lettuce leaves and pat dry. Remove and discard the center ribs then slice in half so you end up with 16, about 3 inch long pieces. 

Fill a saucepan halfway with water and salt the water. Bring to a boil over high heat. Add the shrimp and cook until pink, about 2 minutes. Turn the heat to low, take the shrimp out of the pot with tongs or a slotted spoon and rinse with cold water, pat dry. Cut off the tails and slice lengthwise.

Place the rice noodles in the pot of still hot water to soften. Cook until soft. Remove and rinse in a colander under cold water. 

Create a workspace lined up with lettuce, herbs, carrots, avocado, shrimp and rice noodles. Fill a clean skillet or shallow bowl with warm water to soak the rice papers. Arrange a damp towel on your workspace. One at a time, dunk the rice papers into the warm water to soften. Remove from the water and run under cool water. They easily stick together, so the cool water is a good time to unstick them from themselves. Lay flat on the damp towel.

To assemble: place 2-3 shrimp halves pink side down about 1/3 from the bottom, layer over mint and basil, then avocado, then carrots, rice noodles, then lettuce leaves. Roll up like a burrito by pulling up the bottom, tucking in the sides, then rolling till the end. The rice paper will stick together sealing it shut. Repeat with remaining rice papers. 

Serve immediately with the chili sauce. *If chili sauce is too spicy for you, you can tone it down by adding a little bit of lime juice and water. 

*The recipe says it makes 8 rolls, but it is easy to make less if you are cooking for one. I would eat 2-3 for dinner. The components last well in the fridge, so I would keep everything prepped, then just cook the shrimp, noodles and rice papers fresh each night and assemble just before eating!

Annie

I received this book from the Blogging for Books program in exchange for this review. If you are a also a blogger make sure to check out their site on how you too can start Blogging for Books! 

Better For You Brownies + Giada's Happy Cooking

For me, I'm happiest when I'm cooking. For Giada De Laurentiis it's the same. It's also the mantra behind her new cookbook, Happy Cooking. I chose her book for this round of my Blogging For Books.  I have grown up watching Giada on Food Network, but in her past few seasons she has really focused on healthy and nourishing recipes. Something you don't always see on Food Network. I love ya PW but a stick of butter can't go in everything...

Happy Cooking is stock full of happy healthy recipes. And nothing that is too difficult. GDL quotes "make every meal count...without stressing out!" Between her lightened up pasta dishes, gorgeous vegetable sides, Sunday dinner comfort food, I not surprisingly leaned toward her sensible sweet treats for this recipe post. 

Black bean brownies. Don't be scared of them. If Giada is doing it, you know it's no fluke. They are satisfying without being too sweet, the perfect thing to end a meal with. She includes peanut butter chips in her recipe which I obviously omitted. Check the recipe below for some alternate additions!

Better For You Brownies adapted from Happy Cooking
yields 9

Ingredients:
1 (15-oz) can black beans, rinsed well and drained
3 Tbsp. unsweetened cocoa powder
1/2 cup rolled oats
1/4 tsp. salt
1/2 cup packed brown sugar
2 tsp. vanilla extract
1/2 tsp. baking powder
1 Tbsp. espresso powder or coffee granules
1 large egg, plus 1 yolk
1/4 cup coconut oil, warmed so it is a liquid

Directions:
Preheat the oven to 350 degrees. Spray and 8x8-inch pan with cooking spray. Cut a piece of parchment paper to fit the bottom of the pan and adhere it with the cooking spray, then set aside. 

In a food processor, place the drained black beans, cocoa powder, oats, salt, brown sugar, vanilla, baking powder, coffee, egg and yolk. Puree to combine. With the motor running, drizzle in the melted coconut oil until everything is pureed and smooth. Spread the batter in the pan. Bake fro 20 to 25 minutes, or until a toothpick comes out clean. Allow the brownies to cool and enjoy!

*Would be great with chocolate chips sprinkled over the top, a coffee glaze made from coffee and powdered sugar, or a big slathering of almond butter over each piece. Or, you can take these somewhat healthy brownies and serve them with a big scoop of ice cream like I did. Balance ya know?

Annie

I received this book from the Blogging for Books program in exchange for this review. Read more about my thoughts on Happy Cooking here.

Β 

Let's Jam

Bring on the soup, stew, chili and now, jambalayaaaa! My favorite kind of foods. I tried to convince my family to let me make this jambalaya back when it was still hitting 100, they didn't go for it.  Now that it's relatively chilly most days, I jumped on my chance again. 

Alana from Eating From The Ground Up is the mind behind my new cookbook, The Homemade Kitchen. The book is stocked with recipes using fresh and delicious ingredients. This is one of my favorite Blogging for Books cookbooks I have received. I love how real the recipes are. No crazy ingredients, nothing too fussy. Alana has specific mantras she lives by while in the kitchen. Feed yourself, eat outside, start where you are, be a beginner, and more. My favorite is "do your best and then let go."

Jambalaya from The Homemade Kitchen
serves 6-8

Ingredients:
1 lb. boneless, skinless chicken breast, cut into 1-inch pieces
1 Tbsp. paprika
1 tsp. salt
6 oz. chopped bacon
2-3 leeks, cut in half and thinly sliced
3/4 cup finely chopped yellow onion (1 small onion)
2 large red bell peppers, chopped
1 jalapeno, seeded and diced
2 Tbsp. finely chopped garlic
3 cups hot chicken stock
2 bay leaves
1 1/2 cup uncooked rice
12 oz cooked, andouille sausage, cut and cooked into 1/2-inch rounds
1 lb. fresh shrimp, peeled and deveined
1/4 cup chopped scallions
1/4 cup finely chopped flat-leaf parsley

Directions:
Toss the chicken with the paprika and salt and set aside. heat a large heavy-bottomed pan over medium heat. Add the bacon and cook, stiffing often until crispy about 10 minutes. Transfer the bacon to a medium bowl, leaving the bacon fat in the pot. Cook the chicken in the fat, stirring occasionally until brown, about 5 minutes. Remove the chicken from the pot and add to the bacon bowl. 

If you don't have enough bacon grease leftover, add oil to cover the bottom of the pan. Add the leeks and onion to the pot and cook, stirring often, about 5 minutes. Add the red peppers, jalapeno, garlic and cook over medium heat. Stir occasionally until the whole mixture is cooked down, slightly brown and smells delicious.

Heat your stock in a medium sauce pan over medium-high heat. Add the bay leaves, rice and sausage and continue to cook, stirring occasionally for about 5 minutes.  Add the hot stock as well as the reserved bacon and chicken, bring to a boil, lower the heat and cover the pot. Cook undisturbed until the rice is tinder and the stock is mostly absorbed, about 30 to 45 minutes. It may take longer depending on your rice. If you are using shrimp, add it during the last 5 minutes of cooking. Once the shrimp is pink, remove the bay leaves, top with scallions and parsley and serve immediately. Best with with a little hot sauce and some cornbread!

I got a little frustrated while I was cooking this dish because the rice wasn't cooking, and it was taking much longer. I tend to get flustered when I'm cooking for others. With a little patience I finally got it finished. I wish I had Alana with me saying, "do your best and then let go." Once the dish got to the table everyone loved it. 

You can purchase The Homemade Kitchen here and make sure to check out Alana's blog for more of her recipes!

Annie

I received this book from the Blogging for Books program in exchange for this review. If you are a also a blogger make sure to check out their site on how you too can start Blogging for Books!

Milk Bar Life

My attempt at recreating the cover of the cookbook.

I was already Milk Bar obsessed and now with my new cookbook I can truly live the Milk Bar life. I think this cookbook just went to the top of my list as being my favorite cookbook. Every recipe is wacky, weird, unusual and amazing!

Like the Milk Bar Life, my baking life isn't so pretty. I'm ready to move on from my old and messy college rent house!

I read this cookbook cover to cover. I don't ever do that. Christina is so quirky and I love the way her brain works. She believes in a cookie a day, using a combination of unique and regular grocery store ingredients and having a real passion or story that belongs to each recipe. She also gives cookie lessons on the best way and amount of time to incorporate ingredients, best timing for baking, cooling and storing etc. 

Compared to the first Milk Bar cookbook, Milk Bar Life features off the menu recipes that come from Christina's life outside the bakery. There are different chapters of the book such as A Cookie A Day, Supermarket Finds, Freakin' Weekend and Hand-Me-Downs. I wrote down a list of the recipes I want to tackle, but first up are The Greta. 

These cookies are named after Christina's mom because she was raised on her mom baking them. Christina's mom would send her disposable 9 x13 pans of the cookies in college and still delivers them to the bakery. I was instantly intrigued with the amount of sprinkles covering the whole top layer and because sugar cookies are my favorite kind of cookie.

Because they are baked in a 9 x 13 pyrex they come out more like a sugar cookie bar. Nothing to complain about there, but next time I am going to try baking them in a jelly roll pan to get a flatter more cookie like texture. Besides that, the vanilla and sweet sugar flavoring is on point. Christina mentions how you can either cover them with a cinnamon sugar mixture or with vibrant sprinkles!  The sprinkle look reminded me of my Cookie Butter Rice Krispy Treats and the cinnamon sugar version kind of reminds me of my Snickerdoodle Bars

Milk Bar Sugar Cookie Squares
yields 2 dozen, 2 inch squares*

Ingredients:
2 sticks unsalted butter, at room temperature, plus more for the pan
2 cups sugar
2 large eggs
1/2 cup grapeseed or other neutral oil (I used canola)
1 1/2 tsp. vanilla extract
3 cups all-purpose flour
1 tsp. salt
1 tsp. baking soda
1/2 cup milk
sprinkles or cinnamon sugar

Directions:
Heat the oven to 350 degrees. Grease a 9 x 13 in baking pan using the wrappers from your butter. *As you can see in the pictures I got 24 tall squares of cookie. They were more of a cookie browning than a cookie. I want to bake these again using a jelly roll pan (15 x 10 in) so I can get larger but flatter cookies. If you test this out let me know how it goes!

Combine the butter and sugar in a mixer fitted with the paddle attachment. Cream on high until homogenous, about 3 minutes. Add the eggs, oil and vanilla and mix until just combined, about 1 minute. 

Add the flour salt and baking soda, mixing until just combined, about 30 seconds. It's important to not over mix the dry ingredients when making any kind of cookie. Over mixing causes your cookies to be dry and crumbly. Mix in the milk until combined, about 30 seconds too. 

Spread the dough in an even layer in the prepared pan. Mix together cinnamon and sugar to sprinkle over the top or decorate with colorful sprinkles. 

Bake for 20 to 25 minutes until slightly undercooked, or 3 to 5 minutes if you want a firmer cookie. My came out really doughy which was sinfully delicious! 

Living the Milk Bar Life is fun and so yummy! Next up I want to make Christina's Lemon Bars, Ritz Cookies, Grandma's Oatmeal Cookies, Egg Soup, Blue Cheese Pretzels, and Chicken Puffs.  Buy your copy so we can live the Milk Bar Life together!

Annie

I received this book from the Blogging for Books program in exchange for this review.

Lavender Lemonade

When I was little, the Sam's size Country Time powered lemonade mix was a staple in our pantry. It was perfect to mix up on summer days or for impromptu lemonade stands. Lemonade is something that has sort of escaped my radar, it's super underrated I just always forget about it.

My lavender cupcakes sent me on a lavender high. While running into a friend the other day she told me how she likes to make lavender lemonade and even went to a lavender festival out in the boondocks of Oklahoma once! Lavender lemonade struck my taste buds and I knew I needed to search for a recipe. Little did I know, a recipe was right under my nose. 

My newest blogging for books cookbook came in a few weeks ago. This time I selected Pure Food written by the founder of Pure Bars, Veronica Bosgraaf. Veronica cooks clean, plant-based food in a simple way that anyone can enjoy. I love how she splits the cookbook up by each month. This recipe for homemade lemonade was found in the June section! I love how this lavender lemonade turned out and I promise it's as easy as the powder stuff minus all the additives!

Lavender Lemonade from Pure Food

Ingredients:
6 cups cold water
1 cup freshly squeezed lemon juice (about 4 lemons)
1/2 cup sugar, blended
3 sprigs of lavender

Directions:
In a pitcher combine cold water and lemon juice. In a food processor or blender, process your sugar for just a few seconds to get it superfine. This will allow it to dissolve easier. Take your lavender and roll it on a cutting board to get the aromas activated. Chop the sprigs roughly and add to the pitcher. Let all the flavors combine and chill in the fridge. 

Serve your lemonade over ice with a sprig of lavender and a lemon wedge!

I easily found my lavender at Whole Foods, just look next to the other fresh herbs. I have a feeling a pitcher of this lavender lemonade is going to be a new staple in my fridge this summer! Take a sip!

Annie

I received this book from the Blogging for Books program in exchange for this review. If you are also a blogger make sure to check out their site on how you too can start Blogging for Books!