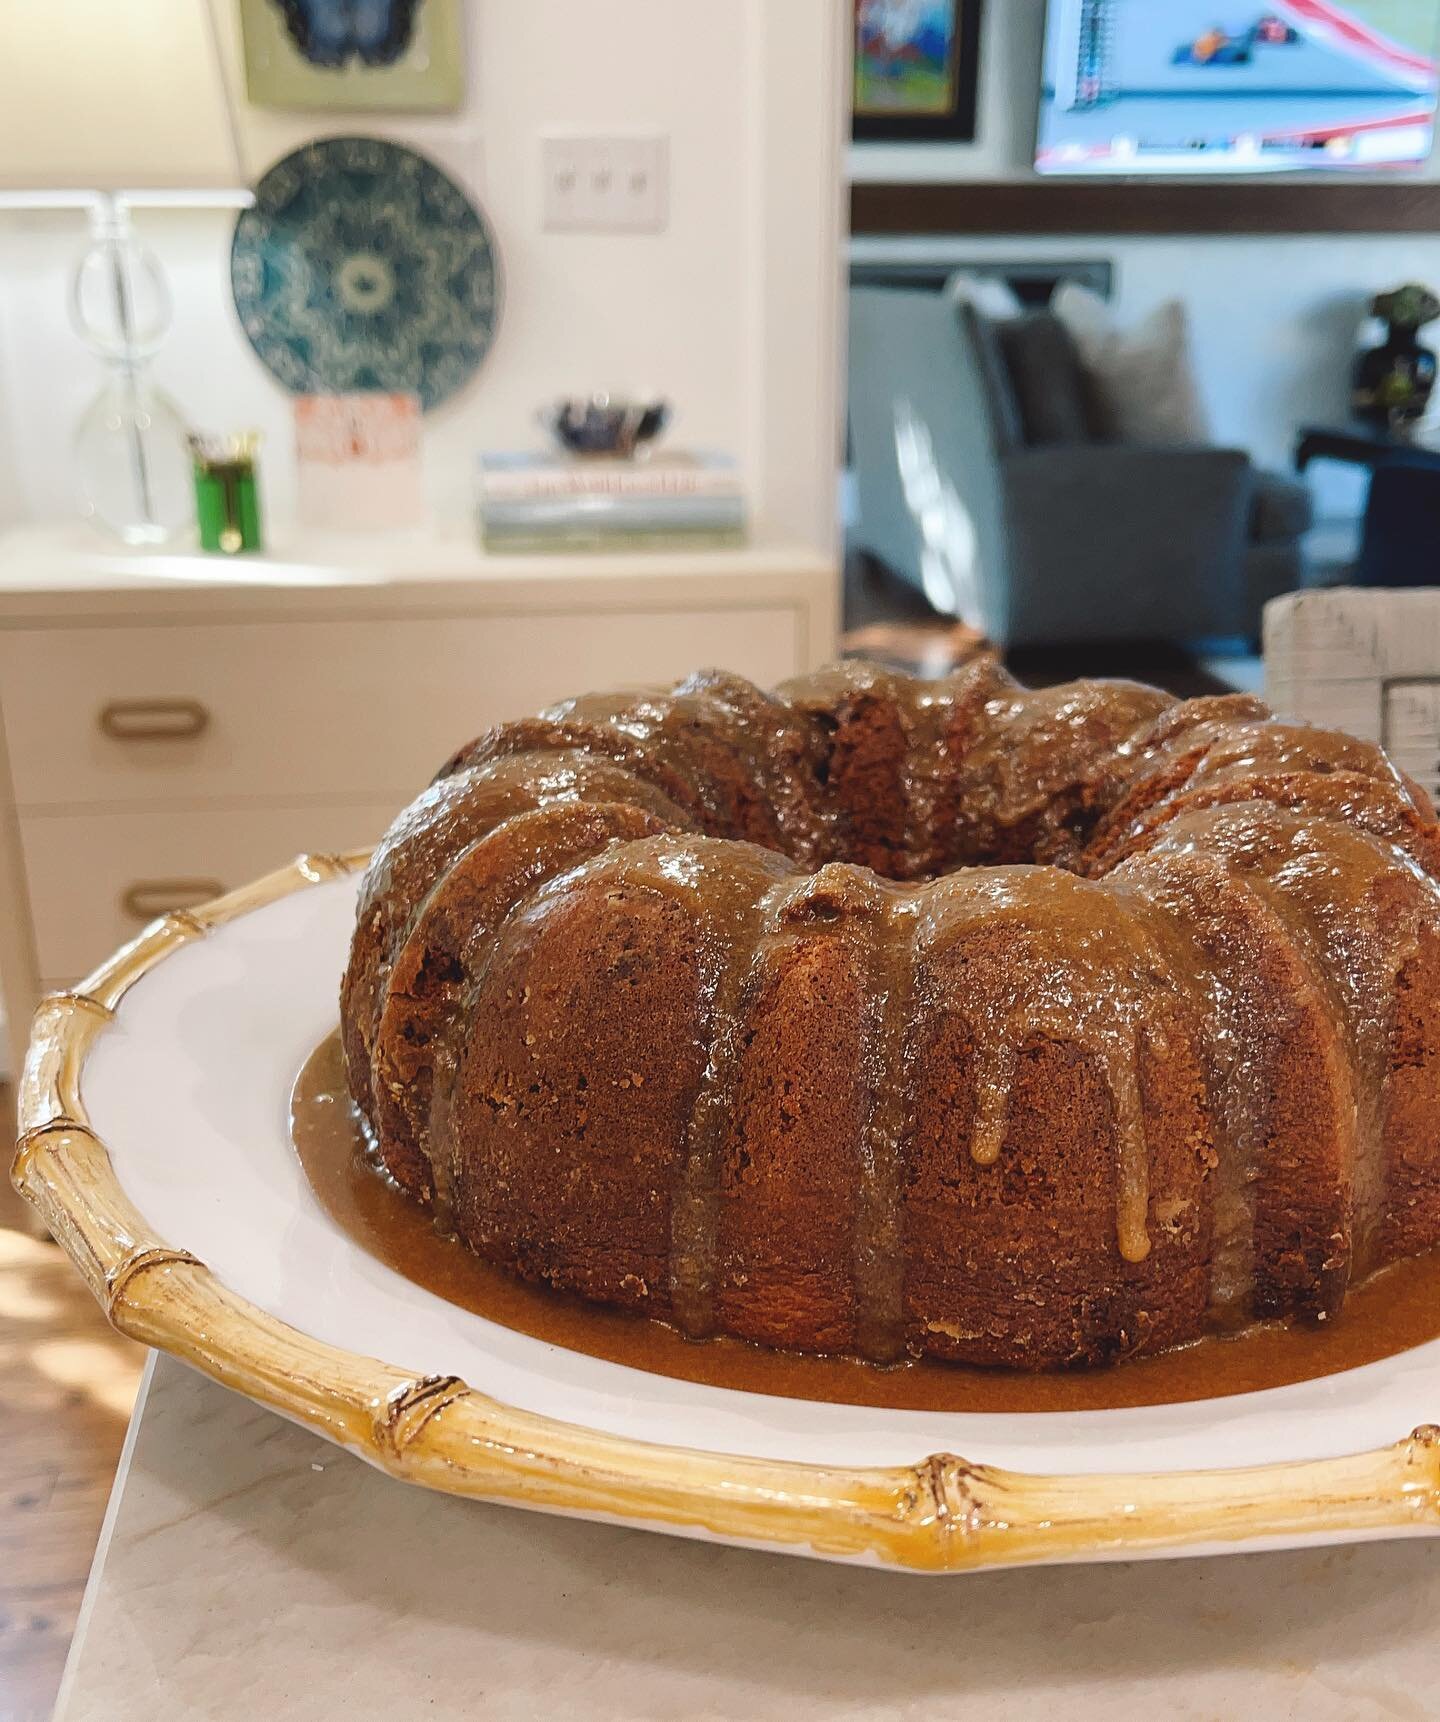
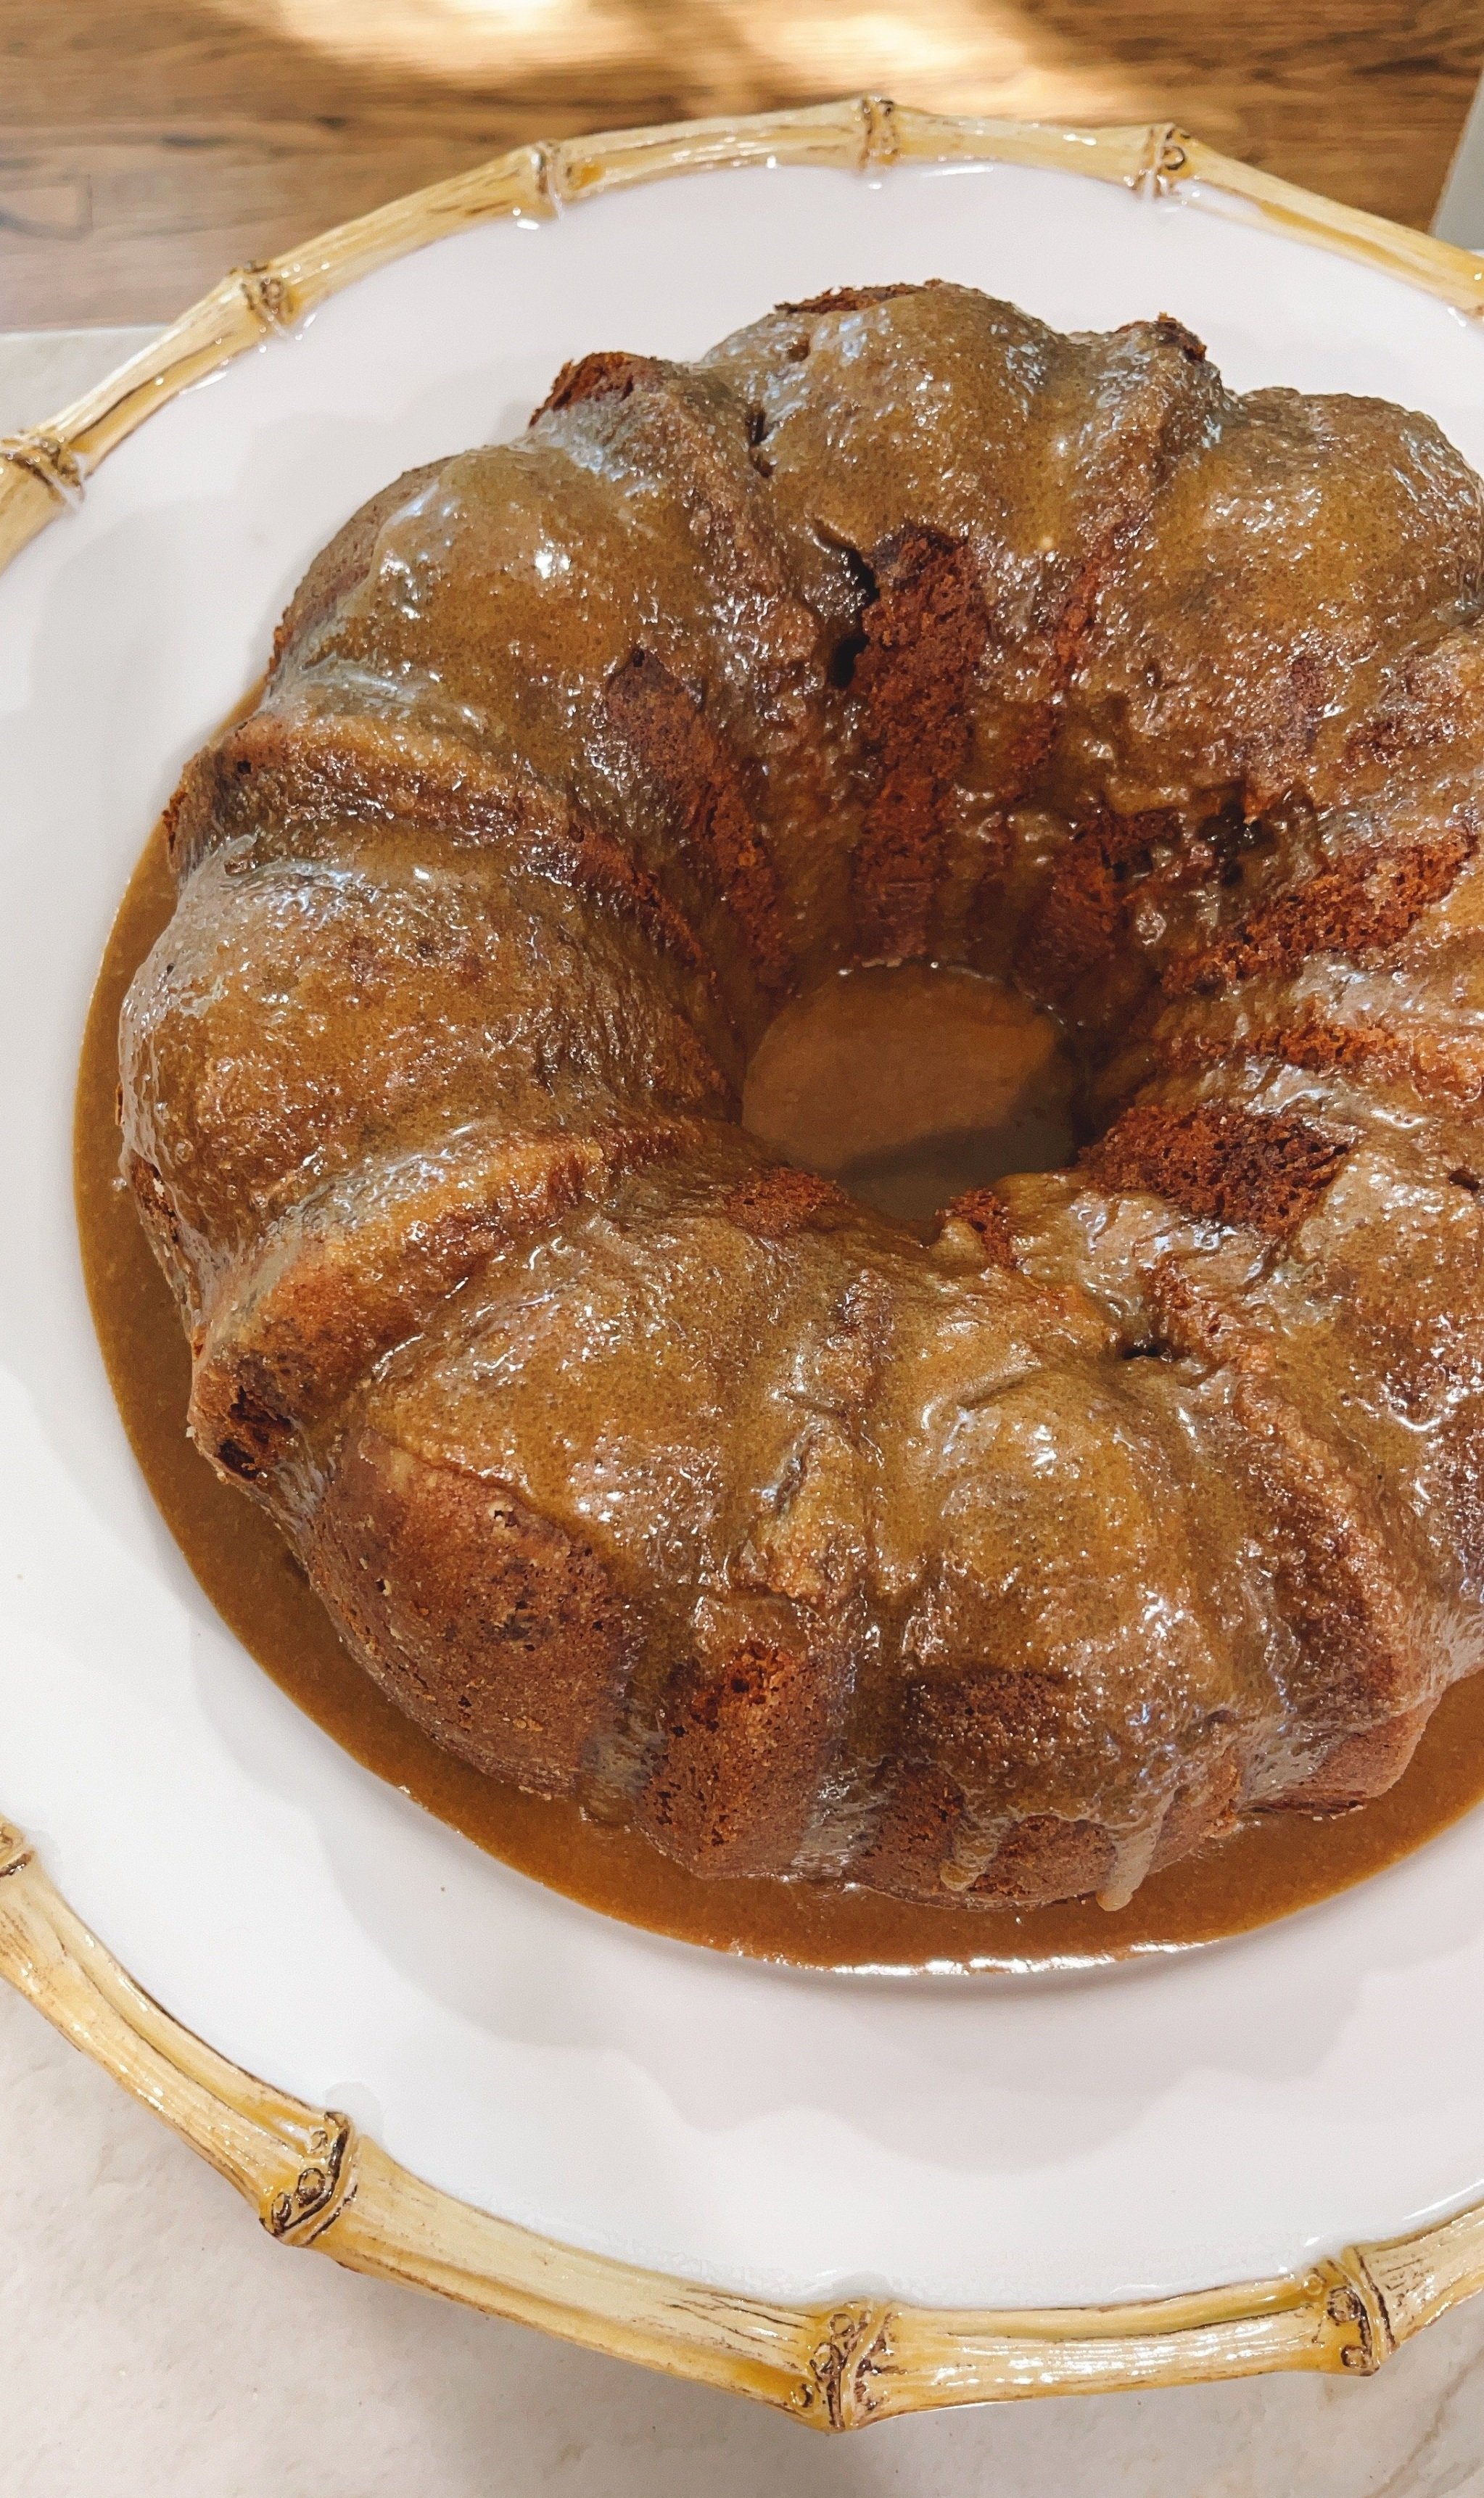
Caramel Butterscotch Cake

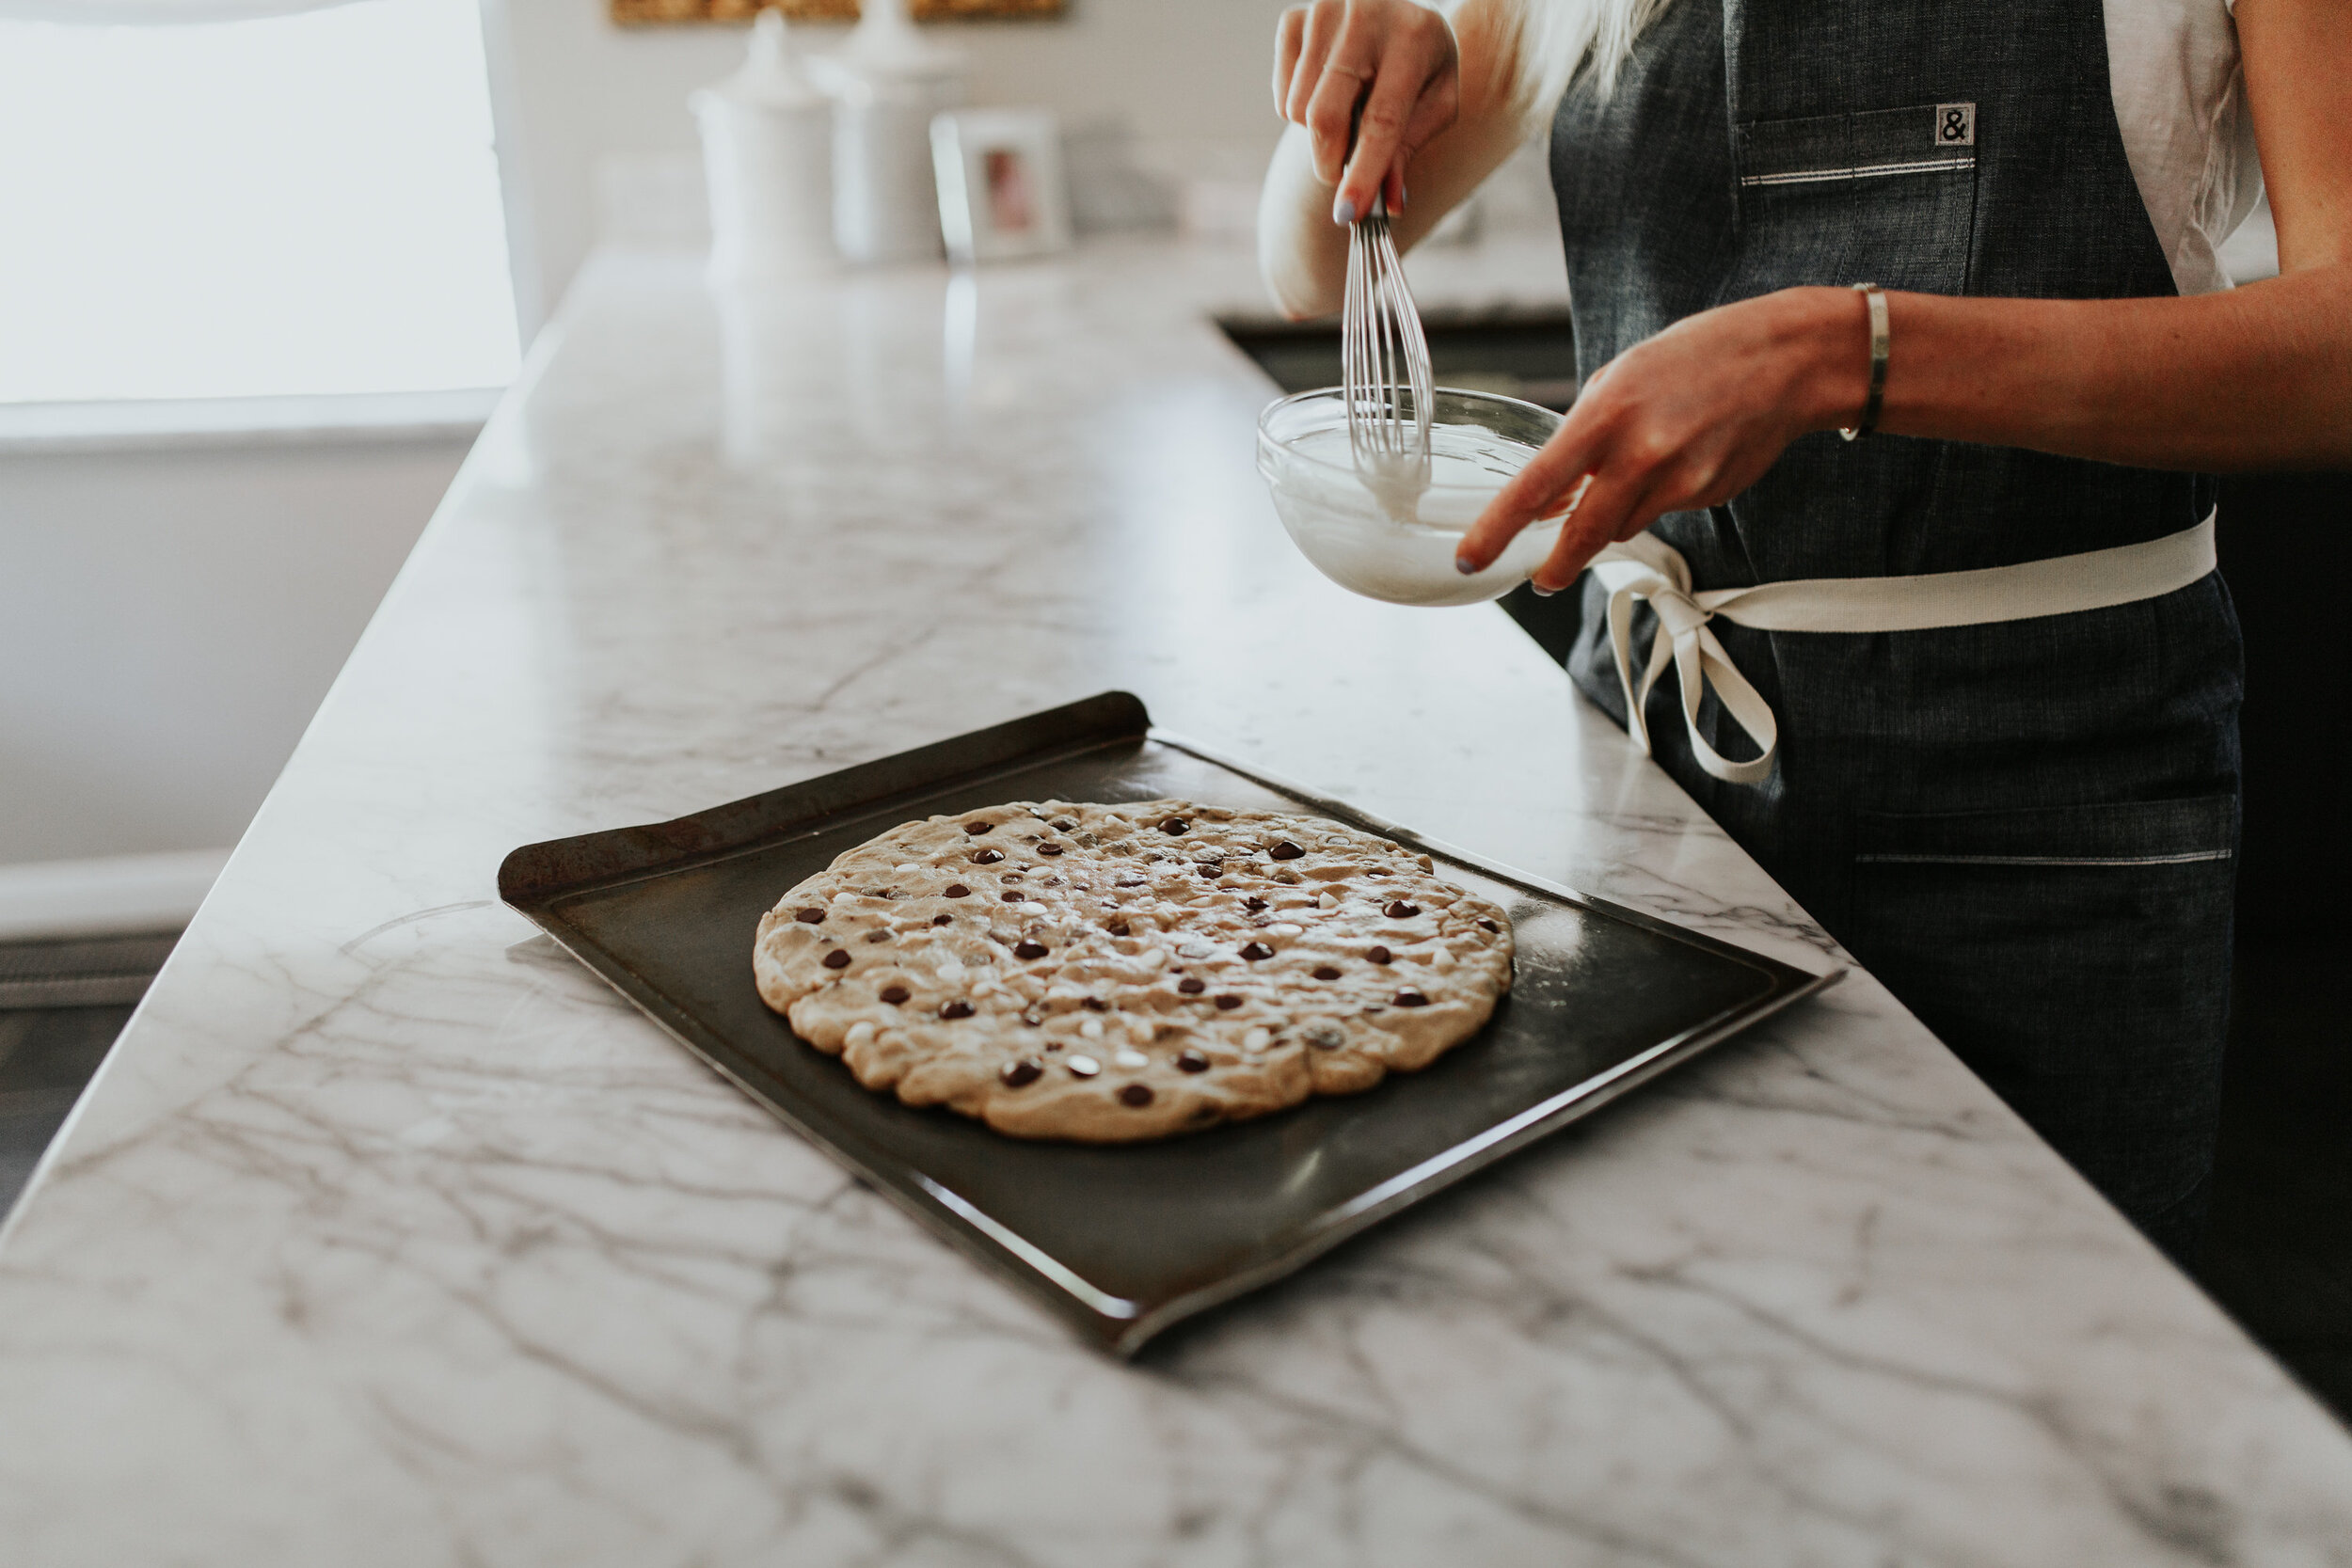
This cake, this cake, oooh this cake. A family favorite. The Tucker’s have been making this cake for years. Specifically in the fall! It’s a classic 90’s cake made from a box cake mix and powdered pudding mix. The original recipe calls for mazola oil in the cake batter and margarine in the icing, I die.

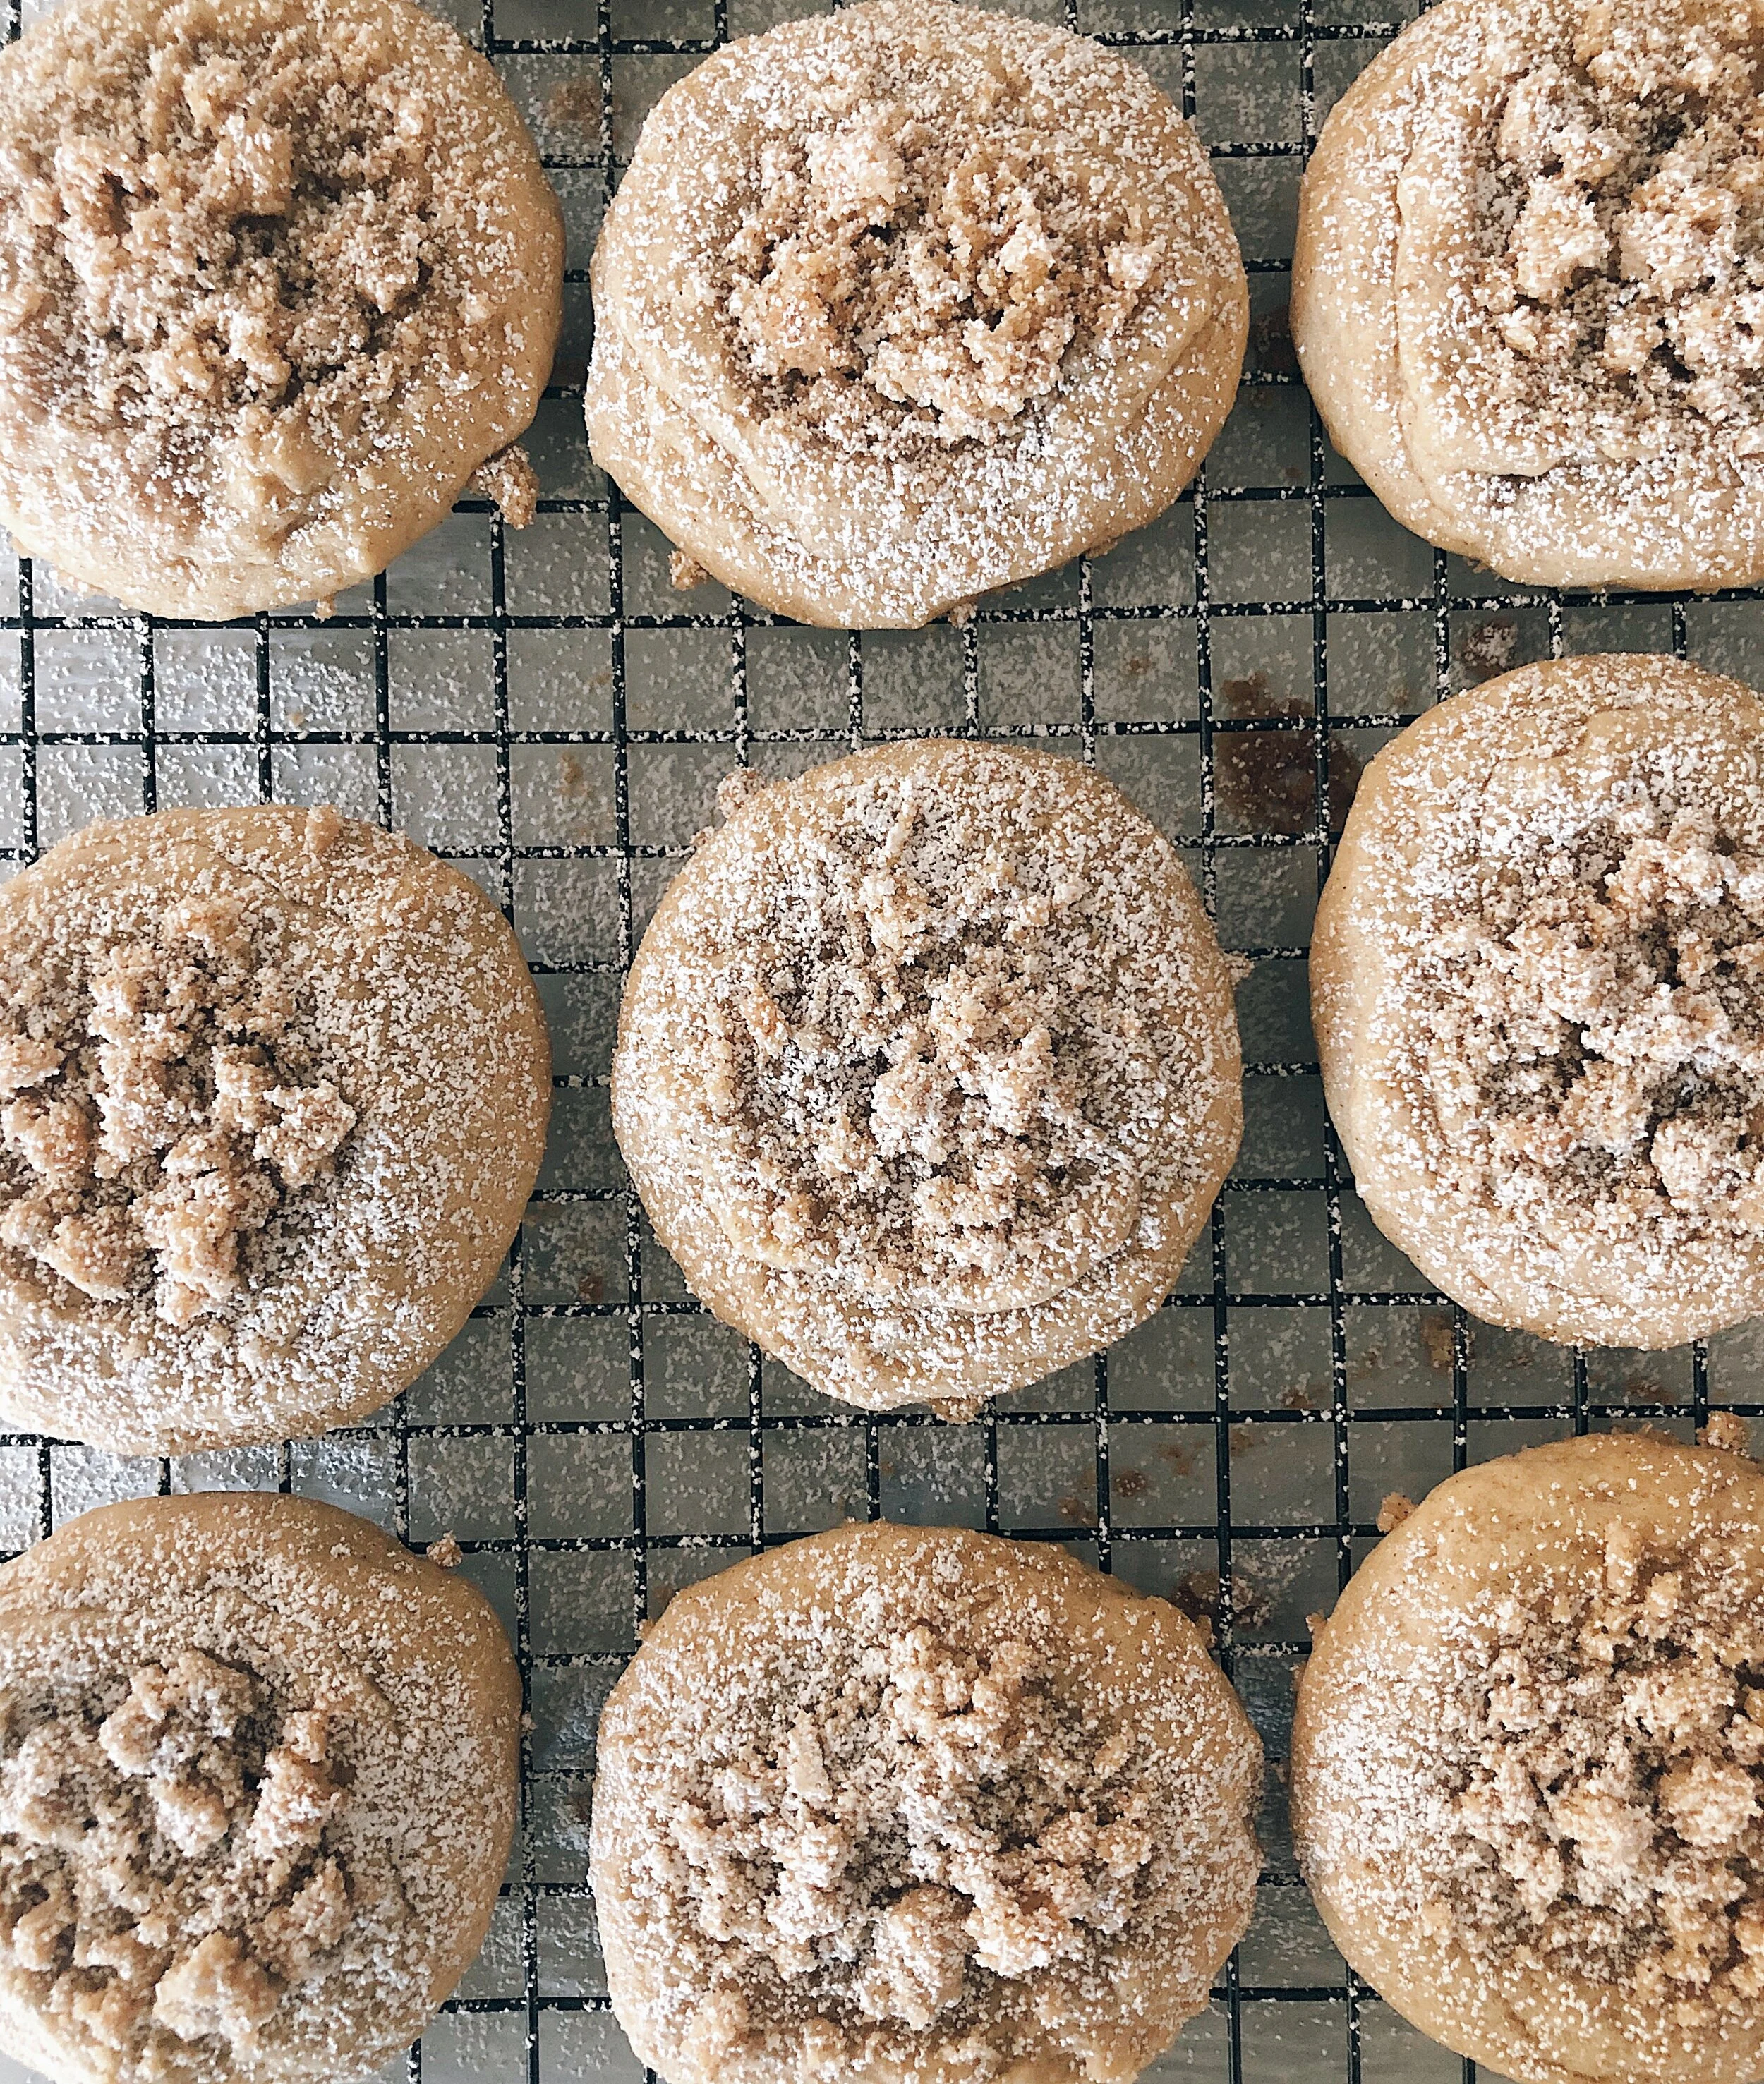
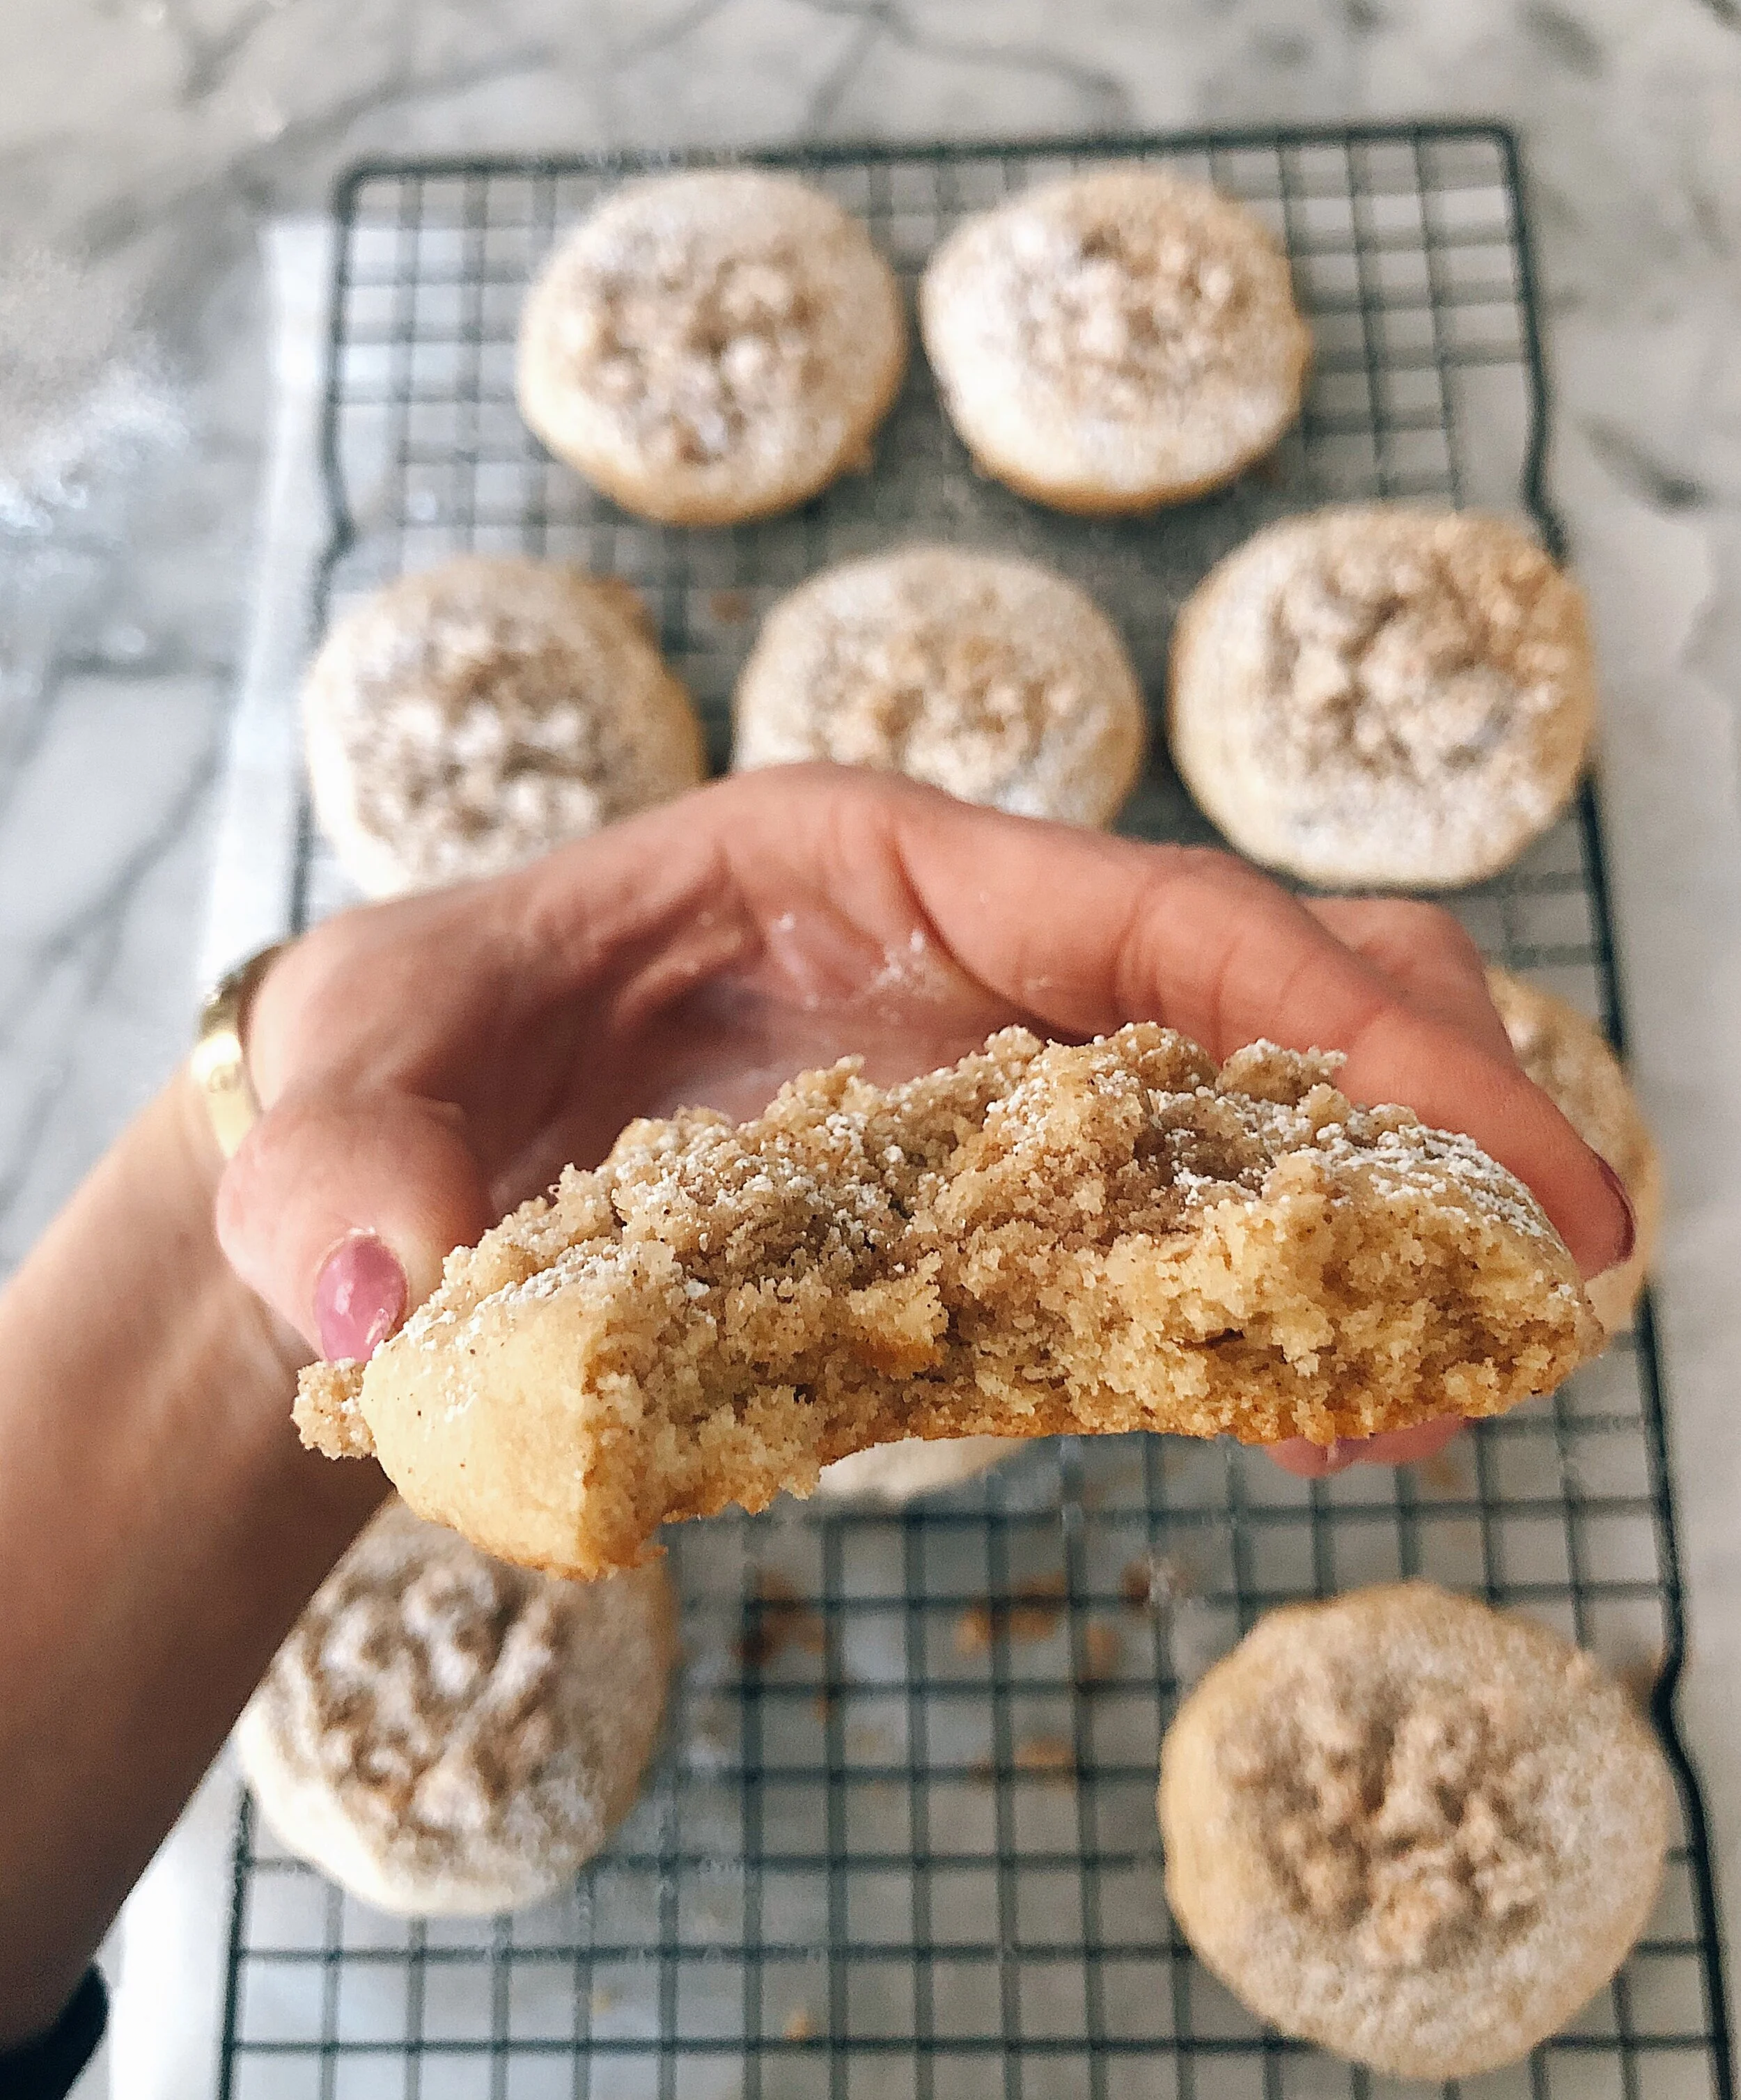
It’s always been called Caramel Cake but there isn’t a lick of caramel in this recipe….I snuck butterscotch into the title to describe its ingredients a bit better. I love, I mean love a butterscotch chip. The best part of the recipe is that it only calls for 1 cup so then you have a leftover cup of chips to snack on. The best dessert is a handful of butterscotch chips.

Cake Ingredients:
1 box Duncan Hines Yellow Cake Mix
2-3.4oz butterscotch pudding mix
1 1/4 cup water
1/3 cup vegetable oil
4 eggs
1 cup butterscotch chips

Icing Ingredients:
4 tbsp. or 1/2 stick unsalted butter
3/4 cup brown sugar
1/4 - 1/2 cup powdered sugar
1-2 tsp. milk

Directions:
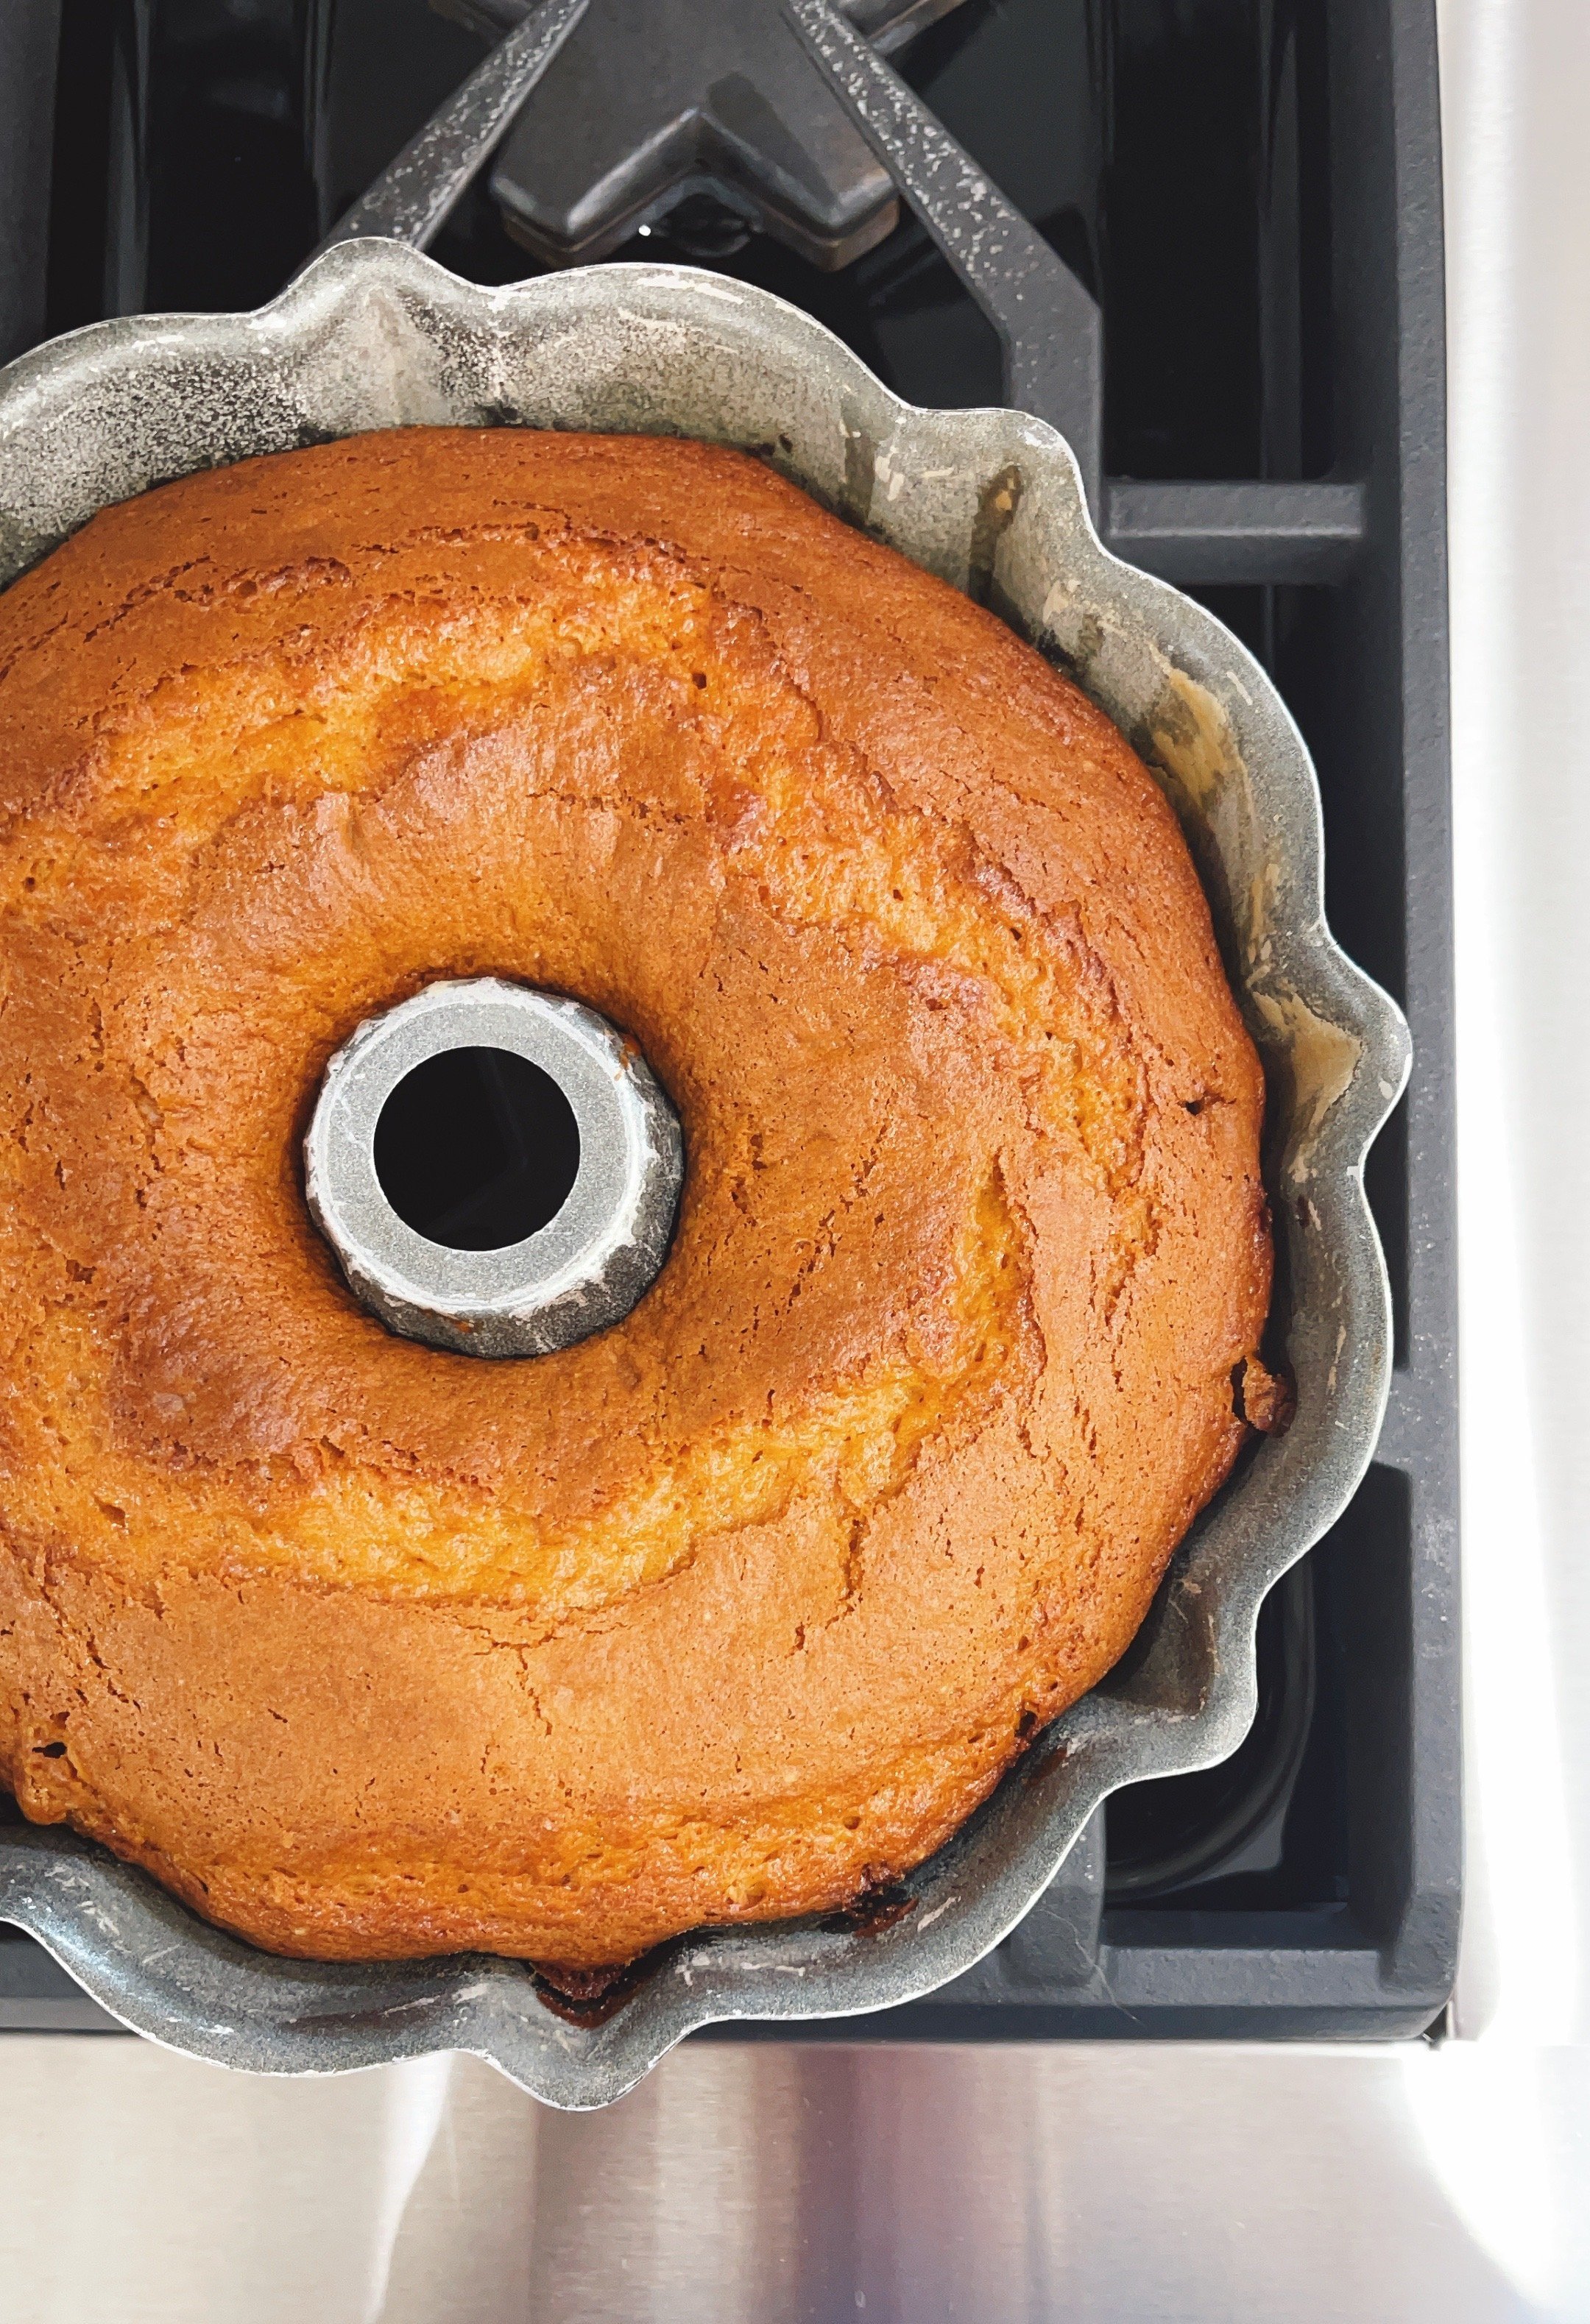
Preheat your oven to 350°F. Use Baker’s Joy to prep your bundt pan or generously grease and flour it and set it aside.

In a large bowl with a whisk or electric beaters, mix together all of the cake ingredients except the butterscotch chips. Once the batter is combined gently stir in the butterscotch chips. Pour into your prepped bundt pan. Bake for 50 minutes and a toothpick comes out clean. Let sit for at least 10 minutes before attempting to remove from pan.

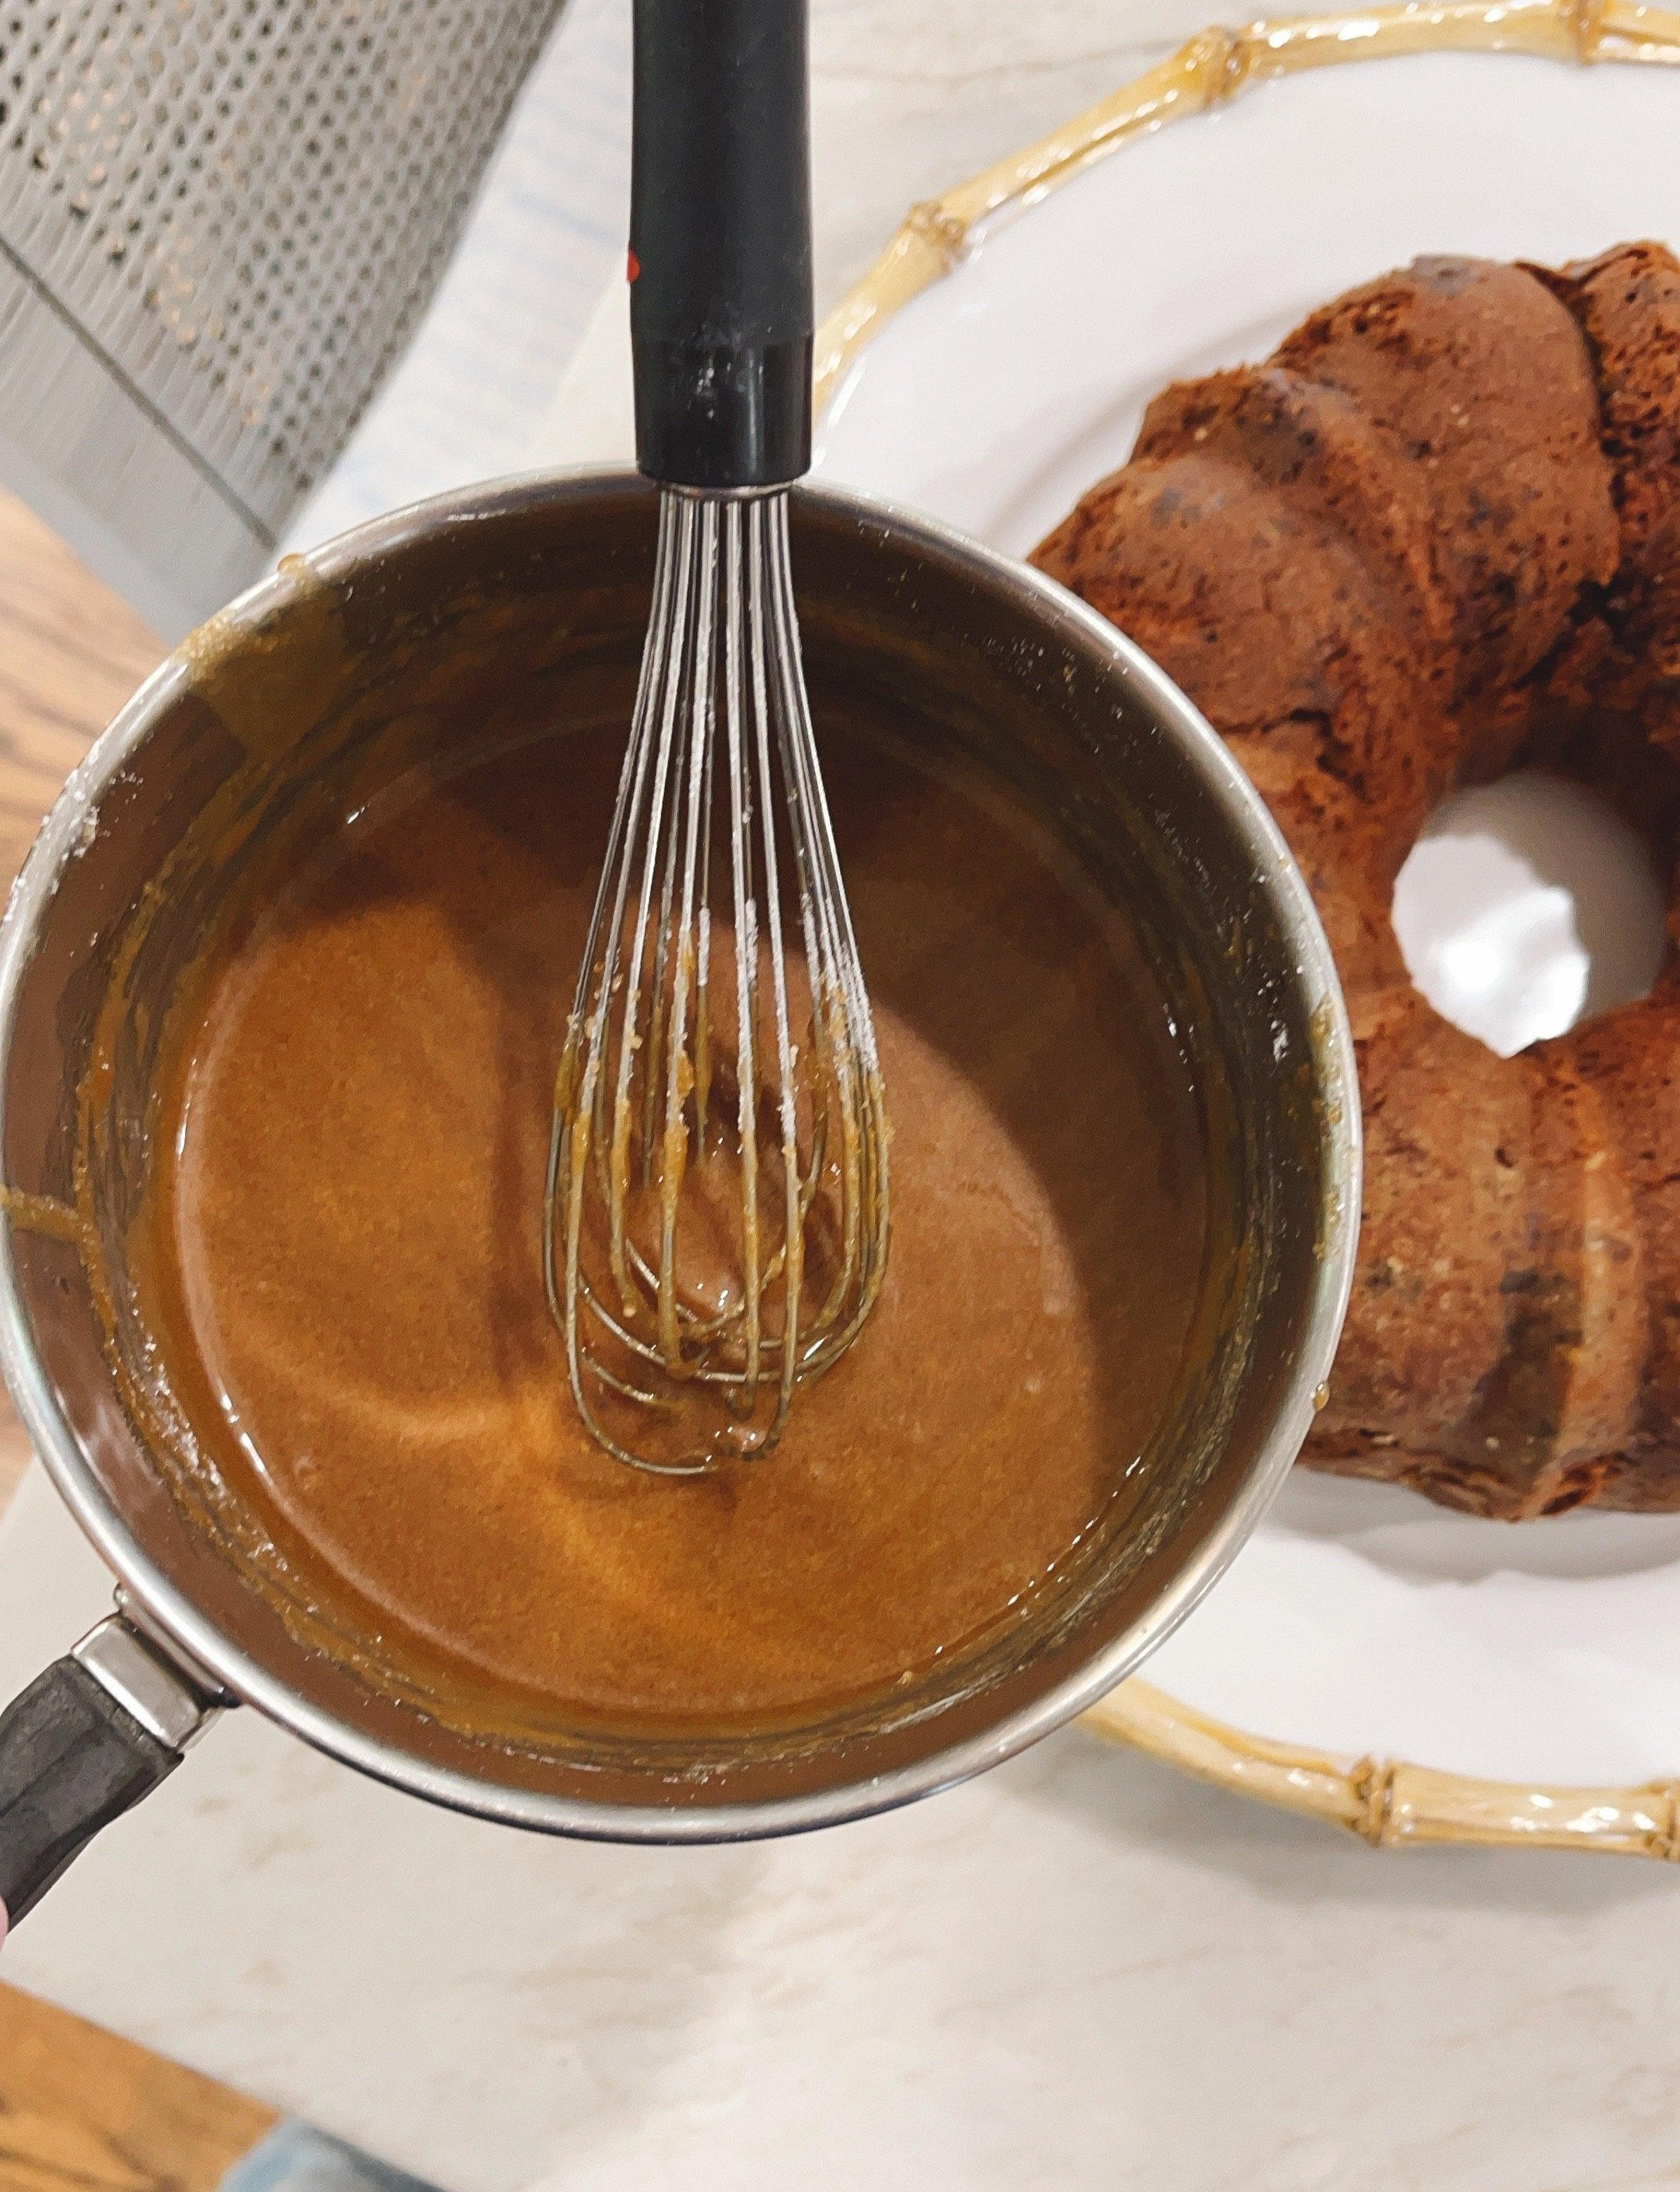
While the cake is cooling mix together oil, brown sugar, and powdered sugar. Add milk 1 tsp at a time until it forms a thick but pourable icing. Run a nife around the outside and inside edges of your bundt pan. Invert your cooled cake onto a serving platter or cake stand. Pour the warm icing over the cake. Let the icing set before serving.

I hope you enjoy this old family recipe, it’s such a great one!
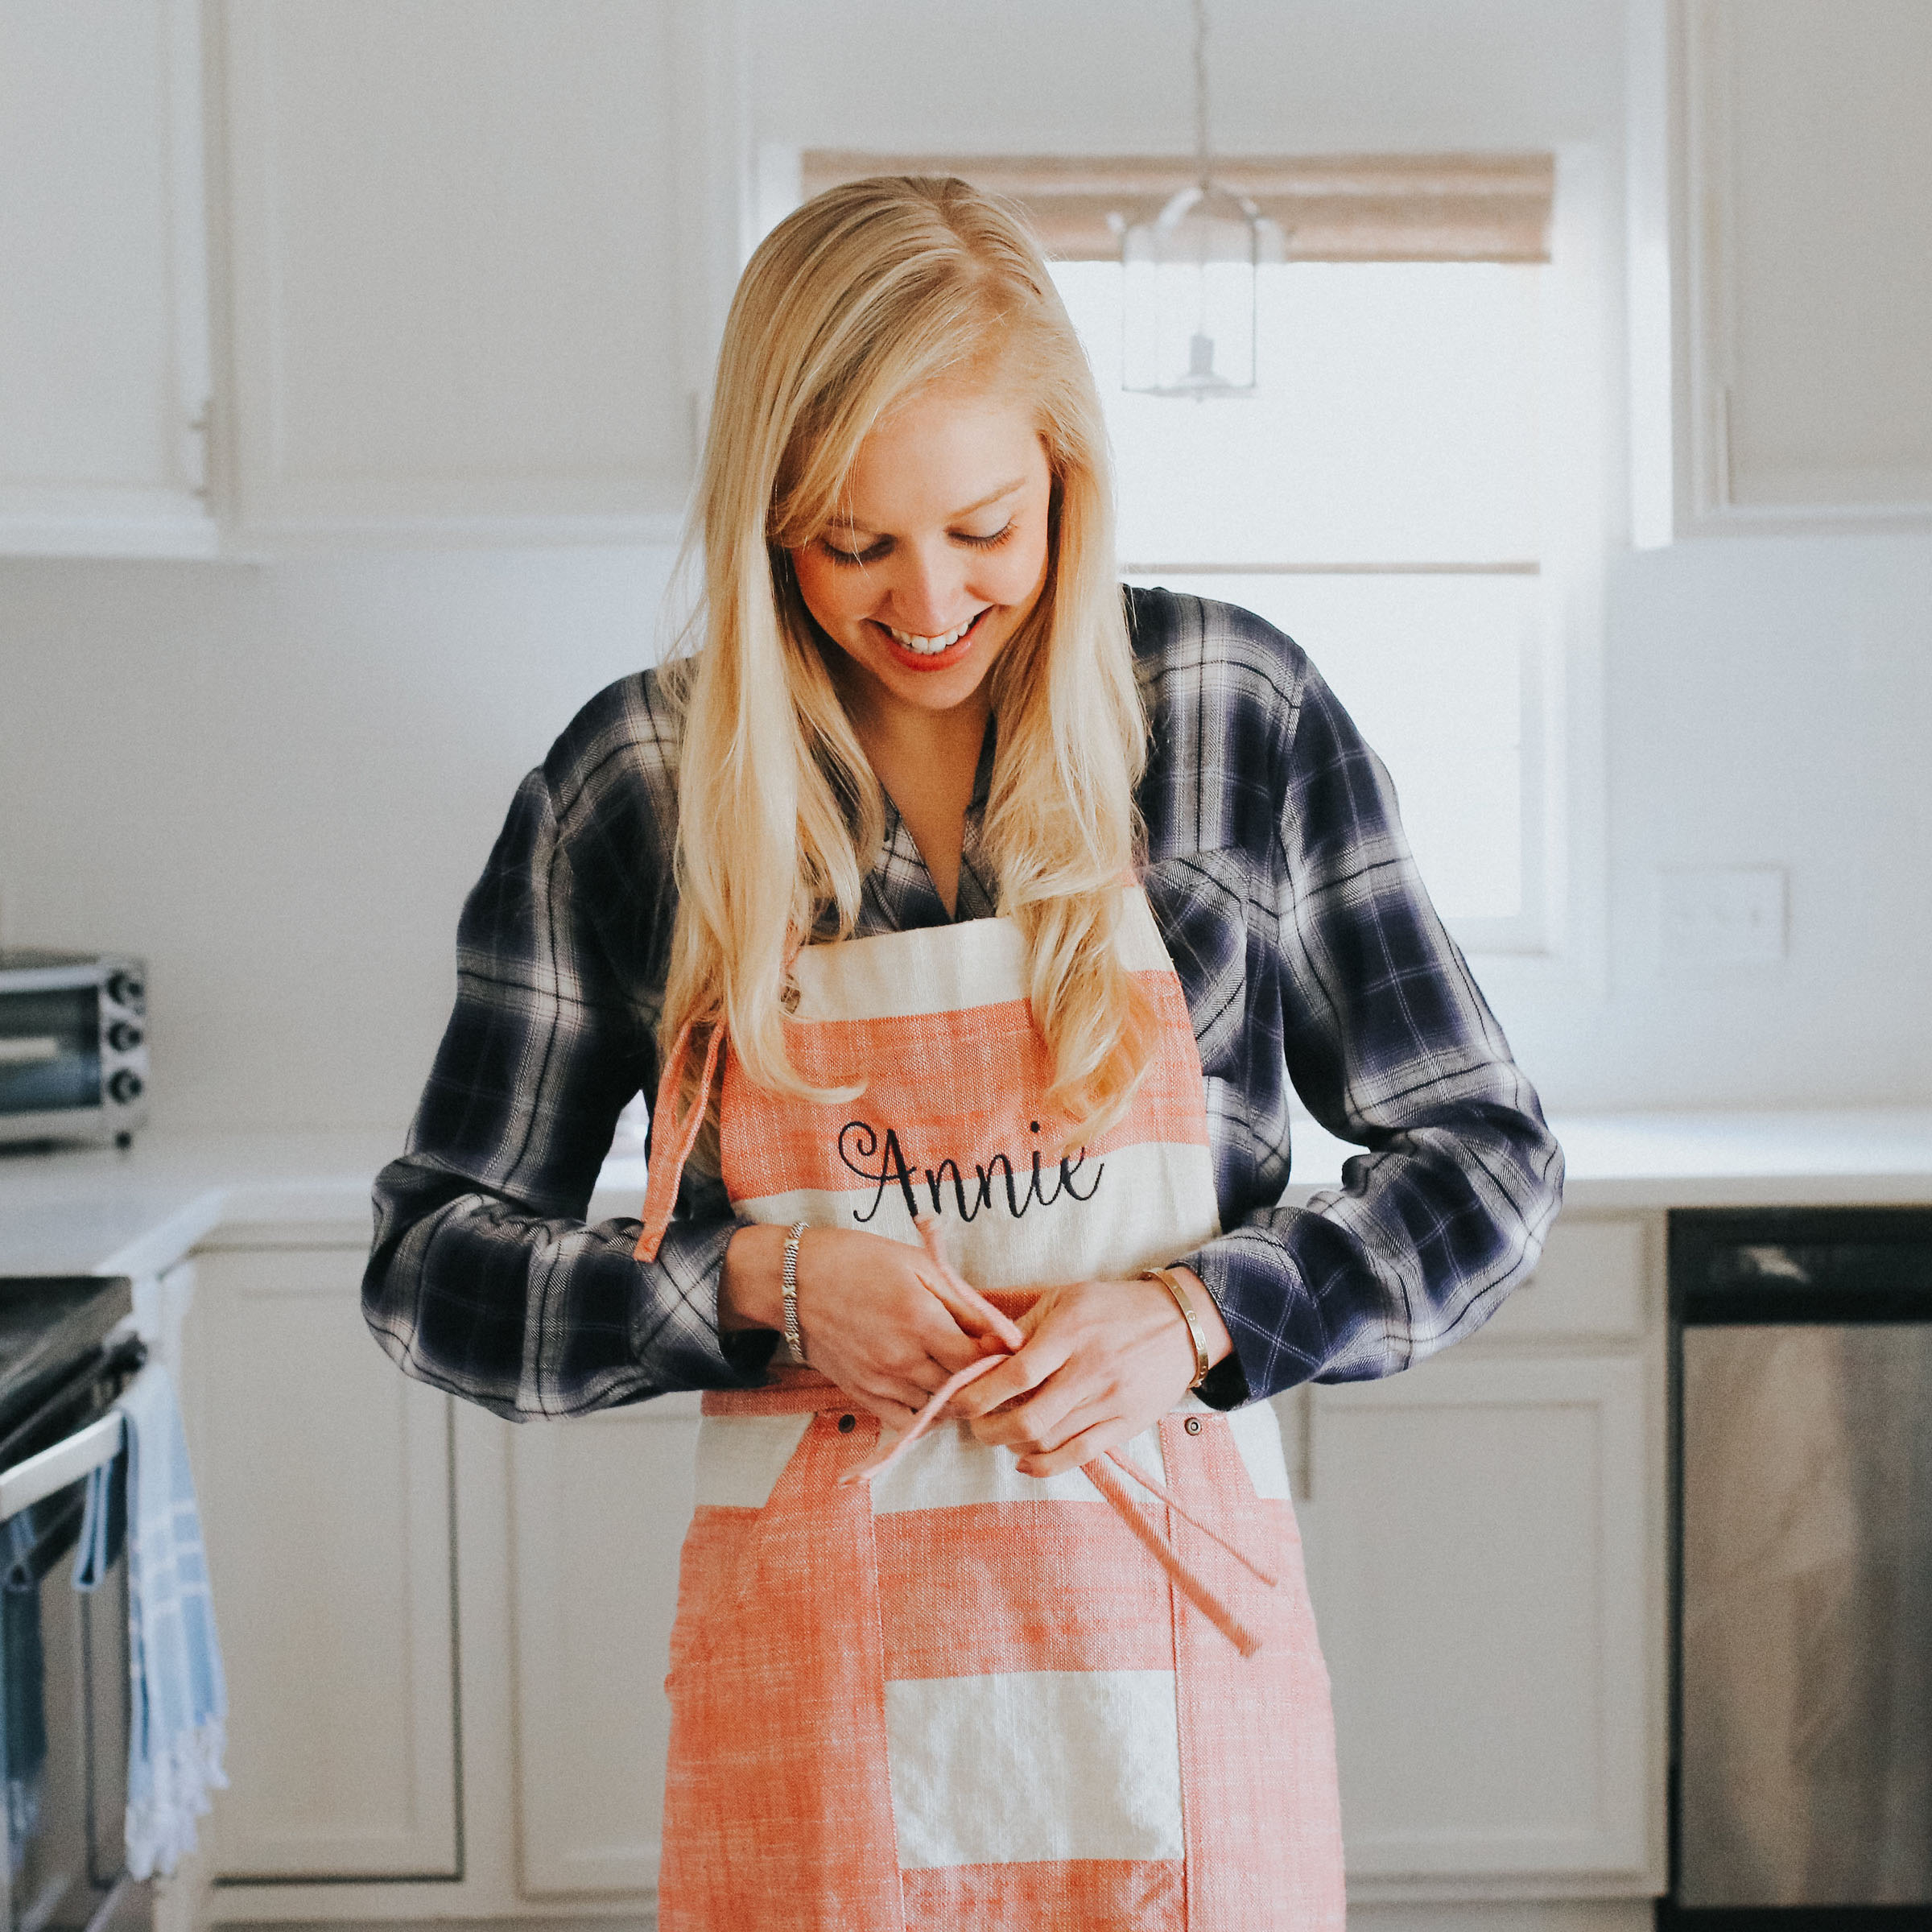
Annie

Cookie Pizza

A nostalgic part of my college years includes cookie pizzas! Not cookie cake, but cookie pizza. You can read more about their origin here. While you’re at it check out my other cookie pizza recipes here, here, and here!

Cookie Pizza1.JPG

Cookie Pizza

Ingredients:
1/2 cup unsalted butter, softened
3/4 cup brown sugar, packed
1/4 cup white sugar
1 egg
2 tsp. vanilla extract
2 cups flour
3/4 tsp. baking powder
1/2 tsp. baking soda
1/2 tsp. salt
1 cup semi-sweet chocolate chips, plus a few more for finishing
sprinkles (optional)

Glaze:
1 cup powdered sugar
1/4 tsp. vanilla extract
splash of milk

Directions:
Preheat oven to 350 degrees. Line a baking sheet with parchment paper. Using a large mixing bowl or round object, about 10 inches in diameter, trace a circle on the parchment paper. Flip the parchment paper over so you don't get any pencil or pen marks when you spread out the dough.

Cream butter and sugars in an electric mixer until light and fluffy, about 2 minutes. Add the egg and vanilla extract.  Add flour, baking powder, and salt, and mix on low until the dough comes together. Add chocolate chips, reserving a few. Give it all another stir.

With clean hands spread the dough out on the parchment-lined baking sheet. Spread the dough out, filling the circle shape you drew. Before baking, press your reserved chocolate chips into the top of the pizza. This ensures an extra pretty cookie! Bake for 10-12 minutes. Start on the low end. The key to yumminess in this cookie pizza is for it to be slightly underdone! You want to take it out just before it starts to brown. Then let it cool completely.

While the pizza cools, make your glaze. Using a hand mixer or whisk, whisk powdered sugar and vanilla, and a splash of milk until smooth and glossy. Add a touch more milk if you need to. It should be the consistency of Elmer’s glue. Drizzle the glaze over the top in a swirly whirly pattern of your choice. Top with sprinkles if you prefer. 

Cut with a pizza cutter and store in a pizza box. 

IMG_2870.JPG

Annie

Blueberry Cardamom Pop-Tarts

IMG_7701.JPG

My friend Lauren recently moved and became my neighbor at our apartment complex. I’ve lived in my apartment for a year and haven’t known a soul, but know I’m feeling settled and comforted knowing a few more faces around the place. She also just got back from a family trip to and around Glacier National Park. Lauren came back bearing gifts and brought me back a jar of blueberry jam made on a blueberry farm in Idaho.

IMG_7687.JPG

My mind instantly passed over jam on toast and skipped straight to using this little gift as the main ingredient in a baked good. I’ve made pop-tarts on the blog before, but I must be stalking Half Baked Harvest too much, and her unique pairing of flavors inspired these more mature pop-tarts. Blueberry and cardamom isn’t a typical pairing, but it’s not unknown.

IMG_7710.JPG

While quarantining with my parents I loved utilizing my mom’s spice cabinet to its full capacity and would sprinkle cinnamon and cardamom on my morning coffee. I’ve kind of been stuck on the flavor ever since and knew I wanted to use this unique spice in my tarts. The pastry is homemade, but don’t let it scare you. It really is a pinch to make and that’s where most of the flavor lies.

IMG_7689.jpg

Cardamom and cinnamon flavor the pastry, the Idaho blueberry jam works as the filling, and a little cardamom in the icing with crushed freeze-dried blueberries finish these off. I’m honestly just loving how pretty they are, but they are equally flaky and delicious.

IMG_7690.jpg

Blueberry Cardamom Pop-Tarts
yields 8 tarts

Ingredients: 
Pastry:
1¾ cup all-purpose flour
2 tsp. sugar 
½ tsp. salt
1 tsp. cardamom
1 tsp. cinnamon
¾ cup unsalted butter ( 1½ sticks), cold and cut into ½ inch cubes
3 tbsp. cold water
1 egg (for egg wash)

Filling:
½ cup blueberry jam or fruit preserves

Icing:
1 cup powdered sugar
¼ tsp. vanilla extract
pinch of cardamom 
1½-2 tbsp. of water
freeze-dried blueberries

Directions:
To make the pastry. In a food processor combine the flour, cinnamon, cardamom, salt, sugar and butter. Pulse until small clumps start to form. Add the cold water 1 tablespoon at a time. The dough may look dry, but let the processor do the work until the dough starts to come together. You don’t want the dough to be sticky, but if it is too dry you can add more water, 1 tablespoon at a time.

Turn the dough onto a floured surface and roll into a rectangular shape, 1/8-inch thick. Using a ruler or tape measurer, cut the dough into 3-inch x 4-inch rectangles. Take any extra dough scraps and roll back out to form more rectangles. The dough should make about 16 rectangles leading to 8 tops and bottoms. Transfer the 8 bottoms to parchment-lined baking sheets. 

To assemble. Spread 1 tablespoon of blueberry jam onto the center of the pop tarts, leaving a ¼-inch border. Brush the egg wash along the exposed edges, and then carefully, using a metal spatula to help you transfer without breaking the dough, place another rectangle of pastry on top. With your fingers gently press around the filling to help seal the edges together. Using a fork, go along the edge to crimp the edges together. Repeat until you’ve used all of the dough. Poke a few holes or slice a couple of indentions in the tarts, for steam to release while baking. Place in the fridge to firm up for 1 hour or in the freezer for 20 minutes. 

Preheat your oven to 400 degrees. Bake the tarts for 18-20 minutes until the edges are just lightly golden brown. Let cool completely before icing. 

To decorate. Once the tarts are cooled, in a medium bowl, whisk together the powdered sugar, cardamom, vanilla extract, and water. If your icing is too thick, you can add more water, but you want the icing to be the consistency of thick paint so they don’t run right off the tarts. Spoon a little bit of the icing on to each cooled pop-tart. Using your fingers, simply crush the freeze-dried blueberries over the tops of the tarts, while the icing is still slightly wet. Allow the icing to harden completely, about 2 hours, before serving. 

*Recipe notes:
If you do not have cardamom
: You can omit it. However it really makes the recipe, so I suggest buying the spice from your grocery store's bulk spice section so you aren’t committed to a pricey bottle of spice. I love cardamom in my coffee. You can also use pumpkin pie spice in exchange for the cinnamon and cardamom. 

If you don’t love blueberry: This recipe would be great with a raspberry! Just swap for raspberry jam and freeze-dried raspberries. Any berry pairs well with cardamom.

If you don't have a Food Processor: You can use your fingers or a pastry cutter to mix the butter with the flour until the butter is pea-sized. Slowly drizzle in the cold water as directed.

To Make Gluten-Free: Use an equal amount of your favorite cup for cup gluten-free flour blend in place of the all-purpose flour. I actually used this GF flour in this recipe!

IMG_7712.jpg

Annie

How to Stock Your Kitchen

I had someone message me last week on Instagram asking for a quick list of pantry baking essentials they could pick up to easily bake a majority of my recipes. I haven’t felt the need to post a list like that on the blog, for it felt a little redundant for what you could find on Google (fun fact: I Google everything). However, after opening up the idea to y’all for writing this style of post, I got an overwhelming, YES, do it, please!! (thank you). So, here we are.

I expanded from just the pantry to my top kitchen essentials. I broke it up into three categories, listing out 10 staples when it comes to baking, cooking, and kitchen gadgets. Writing this post was actually really fun, so I hope you enjoy!

5A1A9833.jpg

photo by KGC photography

Baking:

  1. All-Purpose Flour. However, if you are Gluten-Free, this is my favorite brand!

  2. Granulated Sugar

  3. Brown Sugar. Please do not buy at Trader Joe’s. While I love TJ’s, their organic brown sugar isn’t great for my recipes. I prefer C&H. This goes for granulated sugar as well.

  4. Vanilla Extract

  5. Baking Powder

  6. Baking Soda

  7. Cinnamon

  8. Chocolate Chips

  9. Morton Salt

  10. Maldon Salt. A must for Perfect CCC’s and how I finish almost every dish I bake. You can buy on Amazon, but I’ve also found it at Whole Foods, Sprouts and Central Market.

Cooking:

  1. Olive Oil. I don’t worry about anything too fancy, I love Trader Joe’s selection of well-priced oils.

  2. Coconut Oil

  3. Liquid or Coconut Aminos

  4. Peppercorns with a grinder. Please grind your own pepper, it makes all the difference.

  5. Red Pepper Flakes

  6. Ground Turmeric

  7. Quinoa or Brown Rice

  8. Dried Pasta. I like red lentil or chickpea pasta.

  9. Chickpeas

  10. Marinara Sauce

BONUS!! Gadgets and appliances:
(shop the items below)

  1. Kitchen-Aid Stand Mixer. The holy grail. And NO, you don’t have to wait to get engaged and put this on your register to buy one :) I bought mine in honor of my grandmother after she passed back in 2013. And no, you don’t have to get a gender-neutral color. Think pink folks!

  2. Cookie Scoop. I like 1.5-2 tablespoon size, and prefer one with a rubber grip.

  3. 10-Set Glass Mixing Bowls. If someone has this on their wedding registry, it is my go-to gift to buy. I use these bowls on the daily and they are so well priced.

  4. Wooden Spoon. Mine are so old, but I’m thinking I need to get this one while it’s on sale for $2!

  5. Spoonula. Scrape and spoon! This set allows you to buy a whole spatula set or the spoonula on its own.

  6. Mini Spatula. These are used on a daily basis in my kitchen. Perfect for scraping smoothies out of the blender, making eggs or stirring around fried rice!

  7. Saute pans. I use this 8” and 10” non-toxic set. A 12” size is good to have if serving more than 1-2 people.

  8. Nonstick Cookie Sheet. What I bake all cookies on. This 3-piece set that includes a cooling rack is on sale right now!

  9. Nonstick Sheet Pan. Also known as a rating pan or jelly roll pan. This style is used for my Banana Sheet Cake and all roasted veggies. quick tip: never use this style of pan for cookies, the raised sides will alter the baking.

  10. Parchment Paper. Love this for lining baking sheets compared to using cooking spray.

I could go on and on with this list of pantry staples and favorite gadgets! We didn’t even get to the fridge or freezer. Although, these were the first 10 that came to mind in each section, which means they must be my go-tos. Of course, if you have any questions or want to know my extended list feel free to DM me on Instagram or email me at annie@takeabiteblog.com!

Annie

Coffee Cake Cookies with The Healthy Little Foodie

IMG_3514.JPG

When we look back at this time 10 years from now, I’m hoping that amongst the virus and the illness and the loved ones we may have seen suffered, I hope we also remember all the games we played, walks we went on, loaves of bread we baked and cookies we ate. I love how more and more people are getting in their kitchen more, baking and cooking up a storm.

IMG_3516.JPG

While I’m pretty used to working from home already, this new stay at home order isn’t too far from my normal. I’ve been busier which I’m so thankful for, but still working in the time to be in the kitchen. Quarantine brought a baking bug, and I’ve caught it. The baking bug has also come with a new push of creativity and confidence honestly. I started doing regular Sunday afternoon Instagram Live baking videos the first Sunday of self-quarantine and it was well, really fun.

IMG_3511.JPG

My friend Elyse has also been bit by the baking bug and coming up with all kinds of treats in her kitchen. Elyse bakes completely gluten-free and her recipes are typically made with no refined sugars and dairy-free. You can always count on Elyse for a healthier treat recipe. With all these Live videos and people “going live”" together on Instagram, I pinged Elyse if we should bake together and we jumped on the idea.

IMG_3512.JPG

So we would LOVE if you joined us this Sunday, April 19th at 1pm CST on Instagram! We came up with this recipe for Coffee Cake Cookies which is just really hitting all the trigger points for me right now. Crumb topping, fluffy cinnamon cookie. They taste like a buttery snickerdoodle with a crumb topping. Hi, hello, yum! The recipe can easily be made gluten-free and we give options if you want to use the OG flour and sugar or cleaner ingredients - ha!

IMG_3513.JPG

The Healthy Little Foodie + Take A Bite Coffee Cake Cookies 
Yields 20-22 (or 10-12) cookies
disclaimer: we developed this recipe during self-quarantine and assumed people didn’t need 20 cookies lying around, so we included the measurements to easily half this recipe.

Ingredients:

Crumb topping:
6 tbsp. (3) unsalted butter, cold and cut into small cubes
1/4 cup (2 tbsp.) packed brown sugar (sub for coconut sugar)
1/4 cup (2 tbsp.) granulated sugar (sub for monk fruit sugar or coconut sugar)*
1 (1/2) cup all-purpose or gluten-free flour
1 1/2 (¾) tsp. cinnamon
1/4 (a pinch) tsp. Salt

Cookies:
1 (½ cup or 1 stick) cup of unsalted butter, softened (we prefer Kerrygold or Vital Farms)
1 (½) cup packed brown sugar (sub for coconut sugar)
1/2 (¼) cup granulated sugar (sub for monk fruit sugar or coconut sugar)*
2 (1) eggs
2 (1) tsp. vanilla extract
3 (1½) cups all-purpose or gluten-free flour
2 (1) tsp. baking powder
1 (½) tsp. salt
1 (½) tsp. cinnamon
Powdered sugar or monk fruit powder for dusting 

*if you are using coconut sugar for both the brown and granulated sugar, use ½ (¼)  cup for the crumb topping and 1½ (¾) cup for the cookies. 

Directions:
Preheat your oven to 350 degrees. Line a baking sheet with parchment paper and set aside.

In a small bowl, using your hands, a fork or a pastry cutter, combine all of the crumb topping ingredients. Work the butter into the dry ingredients until coarse crumbs are formed. Set aside.  

With an electric mixer, cream the butter and both sugars until light and fluffy. Add the eggs, one at a time, mixing until well combined. On low, add in the vanilla extract.

In a large bowl, whisk together the flour, baking powder, salt, and cinnamon. In batches, gradually add the dry ingredients into the mixer with the wet ingredients, until the dough comes together. 

Using a cookie scoop or spoon, form golf ball size balls of dough and place on prepared baking sheet 2 inches apart. Make an indention in the center of each cookie with the back of a teaspoon or your finger and fill with 2 teaspoons of crumb topping (be generous with your topping). Bake for 9-11 minutes or until golden brown around the edges. Remove from the oven and let cool on the pan. Then transfer to a wire rack to finish cooling. Once completely cooled, dust with powdered sugar and enjoy!

IMG_3515.JPG

We hope you have most of these ingredients already in your kitchen, if not, see if you can get all of the groceries delivered by Sunday so you can bake with us!

IMG_3517.JPG

Don’t forget! Come watch us on Instagram Live Sunday, April 19th, 2020 at 1PM CST! And if you are reading this post after our Live baking date I’ll be sure to link to the video we record.

Annie + Elyse