Bacon Wrapped Dates

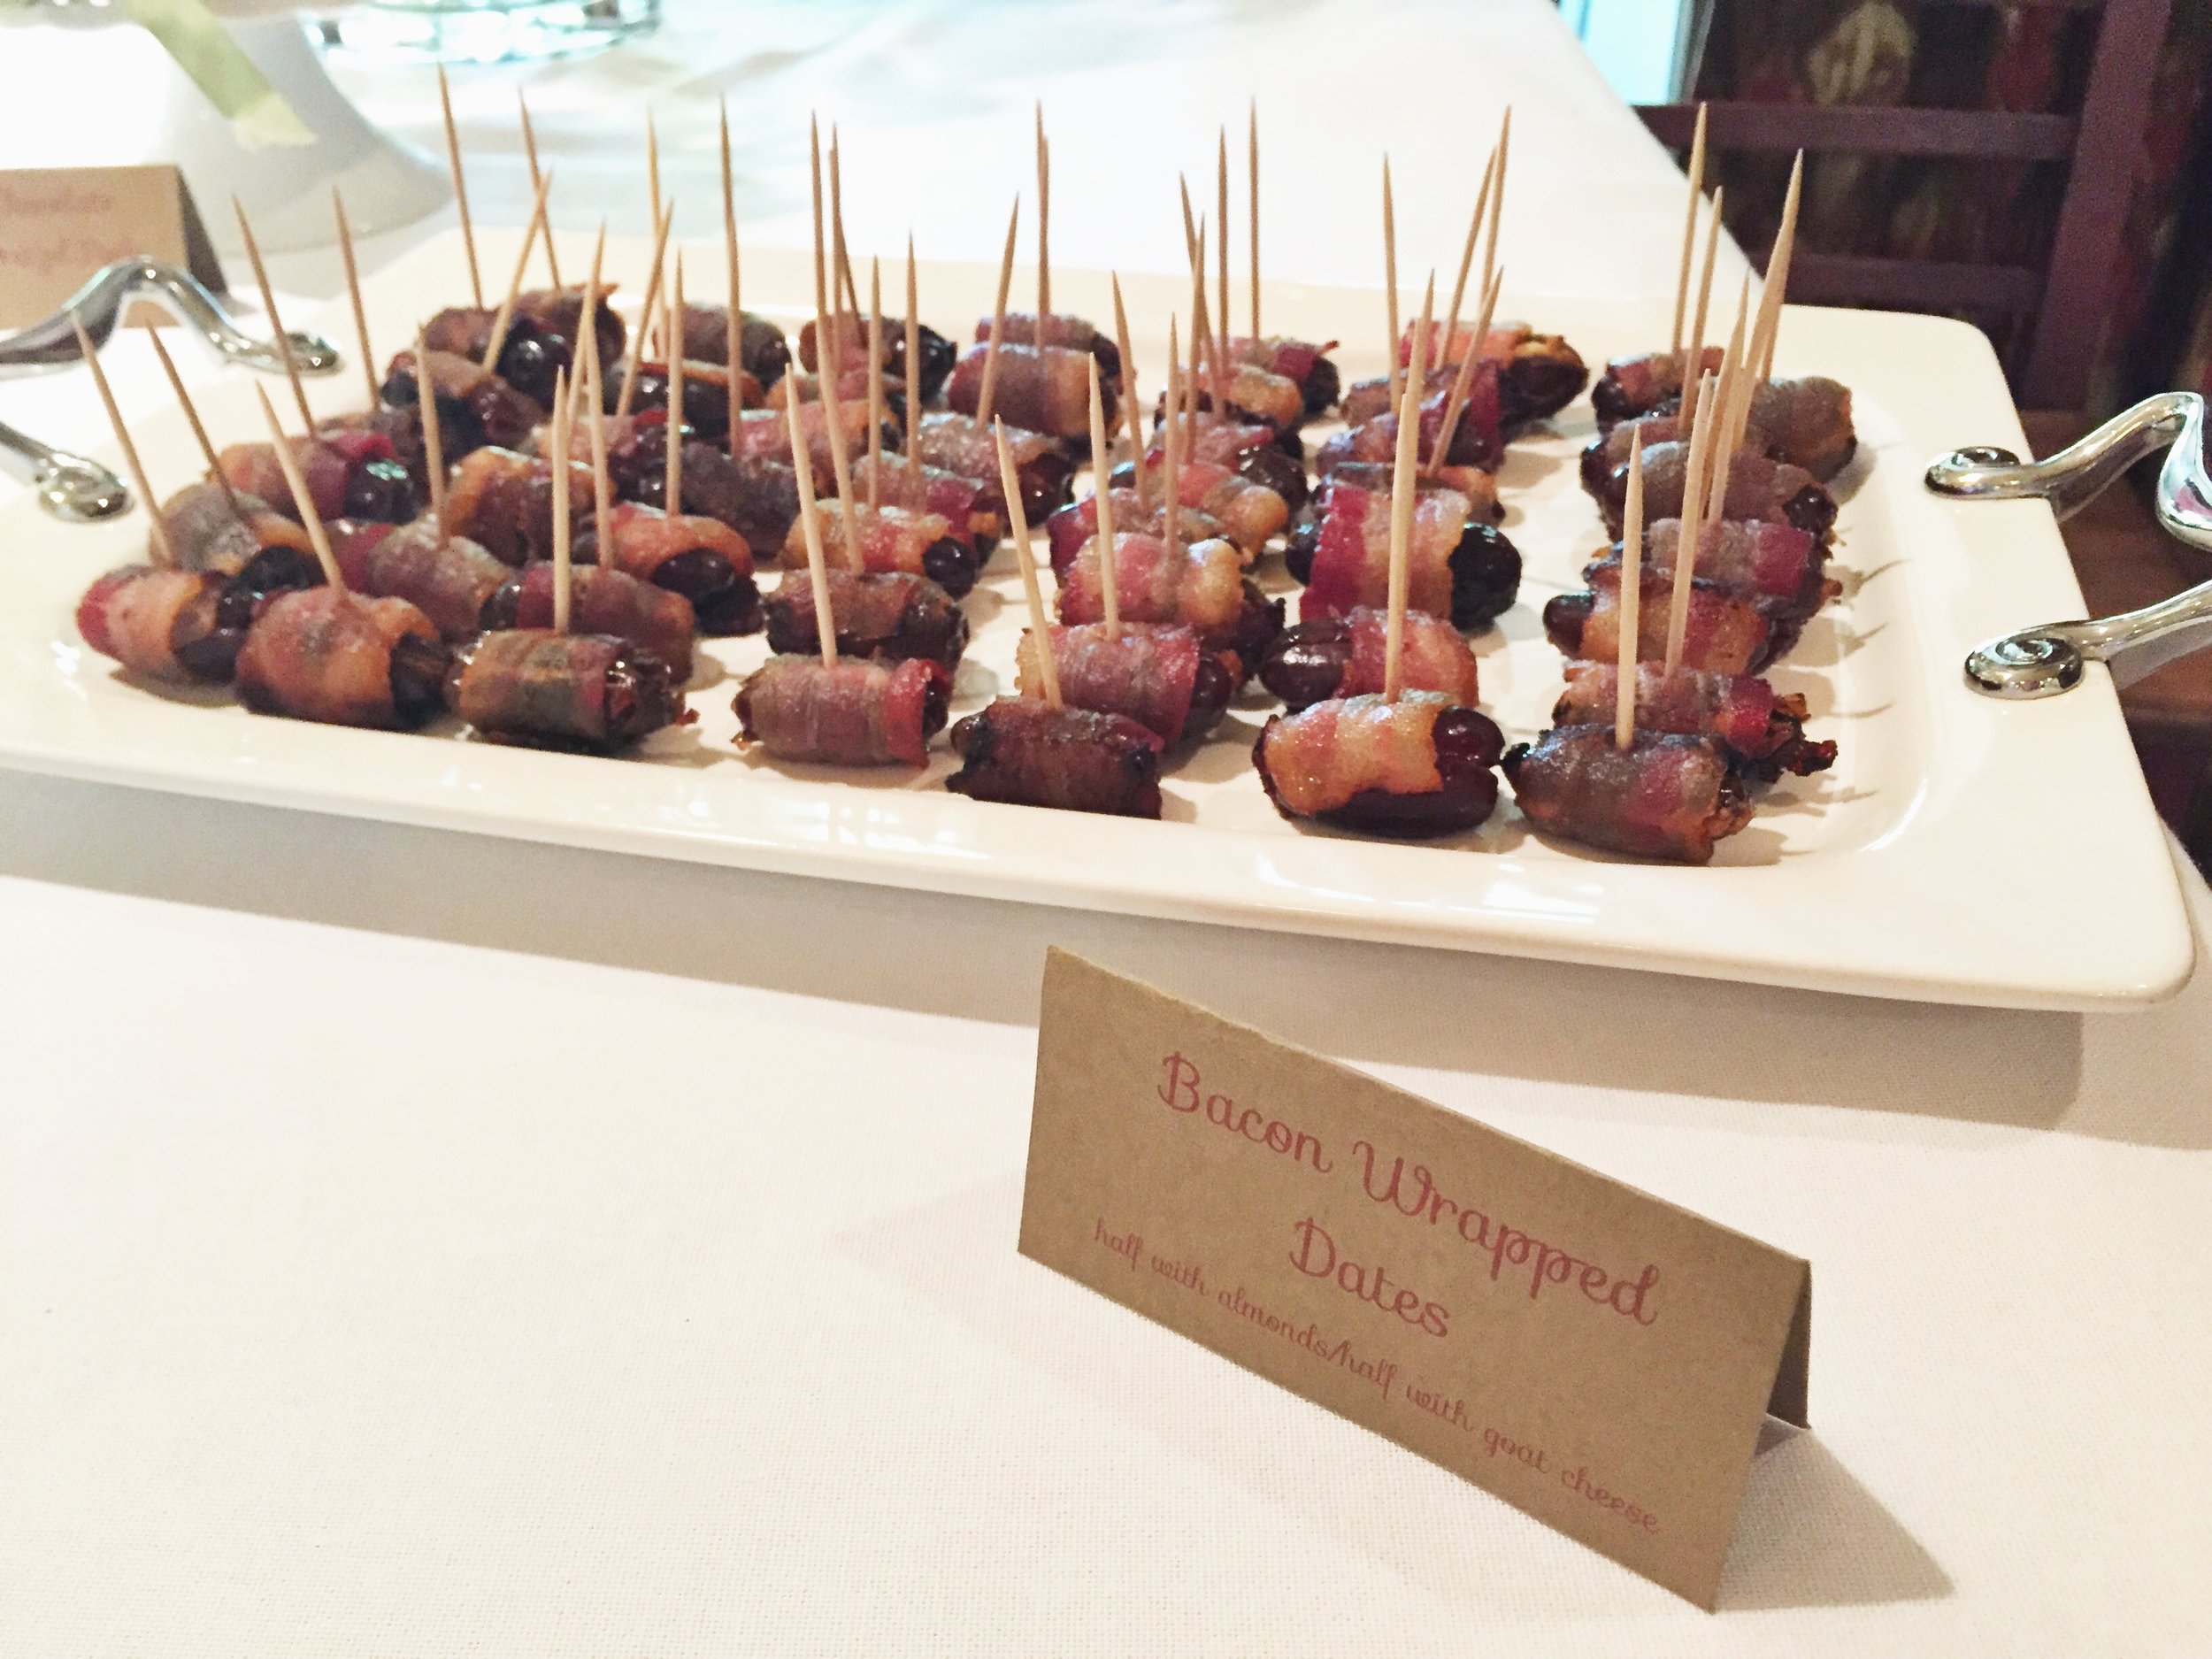
I couldn't let this perfect party appetizer pass without sharing the recipe! I made these bacon wrapped dates with almonds and goat cheese for my good friends wedding shower a couple of weeks ago. I ate about half the platter, but they were still a hit! The creamy cheese or salty almond stuffed in a sweet date then wrapped in bacon, it's just the most sinful little bite. Great for parties of all kinds; dinner party, wedding shower, birthday or football watch party!

The recipe comes from my new favorite book Bread and Wine by Shauna Niequist. The book is chalk full of cozy family recipes. I plan on cooking through the book and sharing more of Shauna's insight on daily life and daily bites, so stay tuned!

Bacon Wrapped Dates adapted from Bread & Wine

Ingredients:
8 oz package of dates, pitted if you can find them
4 oz goat cheese
1/4 cup almonds, roasted and salted (optional)
16 oz pkg. bacon

Directions:
Preheat your oven to 400 degrees. Line a roasting sheet (with sides is best) with foil and set aside. 

If your dates are not already pitted, you will need to pit them. Make a slice lengthwise along the date. Open it up like a little book and remove the pit. Stuff half the dates with almonds and half with a little shmear of goat cheese. Shauna informs you to steer clear of any nut, she says it reminds her too much of the pit, which it does. But I love the crunch! Maybe next time I'll do a little combo of the cheese and almond stuffed inside!

Cut your bacon in half or thirds depending on how long your strips are. Wrap a piece of bacon around the filled date and place it seam side down on your foil lined baking sheet. 

Bake for 20 to 25 minutes until brown. Drain on a paper towel and serve at room temp!

I urge you to go pick up a copy of Bread & Wine. It's the perfect read as fall is arriving! But in the meantime, you can just make batches of bacon wrapped dates to tide you over!

Annie

Roasted Sweet Potatoes & Figs

image.jpg

We all know I love figs. I also have a mad crush on sweet potatoes. I dreamt up this recipe while trying to come up with as many was as I could to include figs in a recipe. I turned to the world wide web for more inspo and it seems that someone beat me to the chase. Not just anyone, but the great Yotam Ottolenghi (Yo-TAm Oh-toe-LEng-he) of Plenty, Jerusalem and more. We are big Jerusalem fans in my family. Thank you for that Claire and Mike. 

image.jpg

Roasted sweet potatoes are such a staple. Throw my favorite fruit with it and you have an insane side dish. So easy, but impressive. Just what I'm about. 

image.jpg

Roasted Sweet Potatoes with Figs adapted from Jerusalem 
yields 3-4 servings

Ingredients:
2 large or 3 medium sweet potatoes
2 Tbsp. olive oil
salt and pepper
red pepper flakes (optional) 
4 figs, stems removed and quartered
2 green onions, whtie and green part sliced on an angle
2 Tbsp. balsamic vinegar

Directions:
Preheat your oven or toaster oven to 475 degrees. (I've been using my toaster oven like crazy in this summer heat to avoid heating my whole house and to avoid an extreme electricity bill).

Slice your sweet potatoes into wedges. Slice in half lengthwise, then in half again, and then again, so you get 8 wedges from one potato. Place the wedges on a roasting sheet and toss with olive oil, salt and pepper and a sprinkle of red pepper flakes.  Roast for 20-25 minutes, flipping them halfway through. 

When your potatoes are almost done, it's time to start making the balsamic reduction. In a small sauce pan, bring the balsamic vinegar to a boil. Reduce the heat and let simmer for 2 to 4 minutes. The balsamic with thicken. You will know when it easily coats the back of a spoon. If it gets too thick you can add a few drops of water to thin it out. 

Arrange the potato wedges and fresh figs on a platter.  Sprinkle over green onions and drizzle with the balsamic reduction. 

image.jpg

Annie

Flavor of the Month: Figs

Duh. If you follow me on instagram, I'm clearly having a fig moment. I think July was the month of matcha, but August is the month of figs. Figs have come a long way since the fig newton days. Nothing against fig newtons, but fresh figs are like little culinary gems these days. 

Fresh figs peak about this time, but snatch up these little beauties while you can, they are only good through early fall. Don't worry, dried figs can carry us through the dark months. Some tips on buying figs: look for ones that are plump, not mushy and rich in color. Black Mission and Turkey figs are probably the most common found in stores, they are the dark purple ones. If you can find them, I really love the calimyrna or kadota figs, bright green in color and bright pink on the inside. Figs are easily perishable so eat them within at least 2-3 days of purchasing. Keep them refrigerated. To prepare: run them under water and remove the stem. Keep scrolling for eye candy fig dishes that I'm coveting! 

Roasted Cauliflower with Figs and Olives from Brooklyn Supper

Fig Scones from Making Today Beautiful 

Beef, Fig, & Red Onion Balsamic Skewers from Every Last Bite

Pizza with Figs, Honey, Ricotta and Thyme from Whole Living

Salted Caramel Fig Blondies from Take A Bite

Strawberry Fig and Almond Butter Smoothie from Take A Bite

Fig and Tomato Orzo Salad from Take A Bite

Fall Cheese Board from Honestly Yum

Cardamom Layer Cake with Salted Caramel and Figs from Erin Made This

Are you feeling my fig moment too? What's your current flavor of the month? 

Annie

Blueberry Banana Streusel Muffins

I have decided Sunday morning baking is my favorite. I've also decided it needs to become a ritual. I love getting up while everyone is still asleep and the house is quiet. Make some green tea, put on my apron, turn on the oven and get baking. Food Network is likely to be playing in the background. 

A few weeks ago I woke up with a huge itch for blueberry muffins. I tried to make them healthy, but every time I try to make baked goods healthy I'm reminded that I should just stop trying. Baked goods are meant to be filled with sugar, butter and eggs and there really is no replacement. Anyway, my last Sunday morning baking adventure failed. Exhibit A. This morning was blueberry muffin redemption day. 

I woke up at 6:48am this morning. My body doesn't know what sleeping in is. With several hours ahead of me before my roommate woke up, I decided it was baking day.

Blueberry muffins had to happen. I also have a stock pile of overripe bananas in my freezer that were begging to be used. Blueberry banana muffins it was. With a streusel topping added because like I said baked goods require lots of sugar and butter. 

They turned out just perfect and helped redeem myself after my previous muffin fail. I edited my pictures and jumped straight onto my computer this morning because I decided you need this recipe NOW. Also, if you have little kiddos at home about to go back to school, make these for them. No better way to beat the back to school blues than with blueberry banana streusel muffins!

IMG_9802.JPG

Blueberry Banana Streusel Muffins
yields 1 dozen

Ingredients:
2 ripe bananas, mashed
1/2 cup sugar
1/3 cup vegetable oil
1/3 cup milk
1 egg, beaten
1/2 tsp. vanilla extract
1/4 tsp. almond extract
1 1/2 cup flour
1 1/2 tsp. baking powder
1 tsp. baking soda
1 cup fresh or frozen blueberries

Streusel:
1/4 cup brown sugar
2 Tbsp. flour
1/4 tsp. cinnamon
2 Tbsp. cold butter

Directions:
Preheat your oven to 350ΒΊF. Line 12 muffin tins with paper liners and set aside.  

Combine bananas, sugar, oil, milk, beaten egg, and extracts in a large bowl with wooden spoon.  Add in the dry ingredients; flour, baking powder, and baking soda and stir to combine. Fold in the blueberries. Using an ice cream scoop, evenly divide the batter into the muffin tins.

In a small bowl combine brown sugar, flour, cinnamon and cold butter. Using your fingers, break up the butter with the sugar mixture to form the streusel. Evenly distribute over the muffins.

Bake for 18 to 22 minutes or until toothpick comes out clean. 

Sunday morning baking for the win. What should I make next Sunday?

Annie

Chocolate M&M Cookie Pizza

image.jpg

Cookie pizzas strike again! I thought the sugar cookie pizza with strawberry icing couldn't be beat, but then this guy showed up. For all you out there that are team chocolate chip cookie over team sugar cookie, I have you covered. M&Ms also came to hang out making it that much better

image.jpg

I love a good cookie cake. When it comes to store bought cakes and you have the option of the sheet cake with overly sweet buttercream, or cookie cake, I go cookie cake. This M&M and chocolate chip flavor brings that classic cookie cake taste home!

image.jpg
image.jpg
image.jpg

It's made very similarly to the sugar cookie pizza. You want to make sure and under cook it a bit for ultimate doughy taste. I found 10 minutes to be perfect. And here is a tip I learned while developing the recipe to help make it extra pretty. Right after the pizza comes out, press a few extra chips and M&Ms into the surface. It's all about visual appeal first. 

image.jpg

Chocolate M&M Cookie Pizza

Ingredients:
1/2 cup unsalted butter, softened
3/4 cup brown sugar, packed
1/4 cup white sugar
1 egg
2 tsp. vanilla extract
2 cups flour
3/4 tsp. baking powder
1/2 tsp. baking soda
1/2 tsp. salt
1/2 cup chocolate chips
1/2 cup M&M's (plus a few)*

Glaze:
1 cup powdered sugar
1/4 tsp. vanilla extract
splash of milk

Directions:
Preheat oven to 350 degrees. Line a baking sheet with parchment paper. Using a large mixing bowl or round object, about 10 inches in diameter, trace a circle on the parchment paper. Flip the parchment paper over so you don't get any pencil or pen marks when you spread out the dough.

Cream butter and sugars in an electric mixer until light and fluffy, about 2 minutes. Add the egg and vanilla extract.  Add flour, baking powder and salt, and mix on low until the dough comes together. Add your chocolate chips and M&M's and give it another quick stir. 

With clean hands spread the dough out on the parchment lined baking sheet. Spread the dough out, filling the circle shape you drew. Bake for 10-12 minutes. Start on the low end. The key to yumminess in this cookie pizza is for it to be slightly underdone! You want to take it out just before it starts to brown. *Right after you take it out, lightly press a few M&Ms into the top of the pizza. This ensures for an extra pretty cookie! Then let it cool completely.

While the pizza cools, make your glaze. Using a hand mixer or whisk, whisk powdered sugar and vanilla, and a splash of milk until smooth and glossy. Add a touch more milk if you need to. It should be the consistency of Elmers glue. Using a spoon drizzle the glaze over the top in a swirly whirly pattern of your choice ;)

Cut with a pizza cutter and enjoy!

image.jpg

I love serving these cookie pizzas in an actual pizza box. It's a fun play on the name and actually a great way to transport it. A local pizza shop has been nice enough to give me a few of their to go boxes when I go in. I may have lied and said I needed them for a school project...but still. I bet if you asked they wouldn't mind sparing you a few!

image.jpg

Annie